Welding is a skill highly valued in various trades and hobbies, yet many beginners face the challenge of finding an adequate workspace. Did you know that building your own welding table can enhance your efficiency and safety while saving you money? In this guide, you will find a step-by-step approach to constructing a professional-grade welding table for just $200. Whether you are tackling projects using MIG, TIG, or stick welding, a sturdy, customized workspace can elevate your work quality and comfort. This DIY project not only aligns with your budget but also empowers you to create a table that meets your specific needs, ensuring a solid foundation for all your welding endeavors. Let’s dive into the essentials of building your own welding table and transform your workspace into a pro setup that supports both creativity and precision.
Choosing the Right Materials for Your Welding Table
is pivotal for creating a solid, functional workspace that can withstand the rigors of welding projects. The primary goal is to ensure durability and support for various tasks, whether you’re utilizing MIG, TIG, stick, or flux core welding techniques. To achieve this, consider using materials that offer strength, resistance to heat, and ease of maintenance.
Steel is an excellent choice for a welding table due to its strength and stability. Thick steel plates, ideally between 1/4 to 1/2 inch, provide a robust surface that can endure high temperatures and the weight of heavy materials without warping. You can choose between mild steel and hardened steel, depending on your requirements. Mild steel is easier to work with and typically more affordable, while hardened steel offers better resistance to wear and longer durability.
Another factor to keep in mind is the design of your welding table. Incorporating a grid or hole-patterned surface can enhance functionality. For instance, you can use a 1-inch hole grid, allowing for greater versatility when securing workpieces. Additionally, consider adding features like side tables or tool holders made from high-density polyethylene (HDPE) for areas where you need lighter and heat-resistant surfaces.
Lastly, do not overlook the importance of a sturdy frame. Using 2×2 or 2×4 square tubing made from steel enhances the stability of your table, preventing any flex during welding operations. Ensure that the frame is well-welded, as any weak points can lead to structural failure during heavy-duty tasks. By selecting the right combination of materials and construction techniques, you will create a welding table that not only serves your current projects but can also accommodate more advanced tasks as your skills develop.
Essential Tools for DIY Welding Table Construction
Building your own welding table is an exciting venture, one that can greatly enhance the efficiency and quality of your welding projects. To successfully construct a reliable and functional workspace, having the right tools at your disposal is essential. This not only assures precision in your build but also ensures a safer working environment.
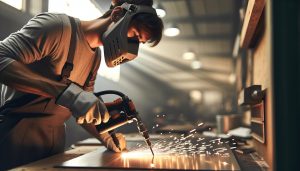
The foundational tools required for building a welding table include a good-quality welder, whether it be MIG, TIG, or stick welding, as each has its own advantages based on the materials used. A strong welding table must be constructed with accurate and durable connections, which can only be achieved using a reliable welder. In addition to the welder, you will need a cutting tool, such as an angle grinder or plasma cutter, to shape your metal pieces accurately. A measuring tape, square, and level are crucial for ensuring your table’s dimensions are correct and that everything is square and true to the level, significantly impacting the overall functionality and usability.
For assembly, clamps are invaluable. They securely hold pieces in place while you work, ensuring that everything is positioned correctly before you begin welding. Additionally, protective gear is non-negotiable; this includes a welding helmet, gloves, and appropriate clothing to safeguard against sparks and heat. A well-ventilated area is also necessary to reduce fumes and ensure a safe working environment.
Storing your tools efficiently can maximize your workspace. Toolboxes or magnetic strips can keep your tools organized and easily accessible, which is especially important during large projects where multiple tools are in use at once. Consider investing in a portable tool cart to enhance mobility and flexibility in your workspace. Overall, using these essential tools will not only streamline the construction of your welding table but also pave the way for a practical and enjoyable welding experience.
Step-by-Step Guide to Building Your Table

Building a welding table is a rewarding way to enhance your workspace while ensuring precision and safety in your welding projects. A strong and stable table not only provides a reliable surface for your work but also allows you to tackle larger and more complex projects with ease. Here’s a comprehensive guide to constructing your own welding table, enabling you to create a professional-quality setup for about $200.
To begin, gather the materials you will need, which typically include steel or aluminum for the tabletop and legs. You’ll want a sheet of steel at least 1/4 inch thick for durability. For the frame, square tubing (typically 1.5 inches) is a good choice as it adds strength without excessive weight. Be sure to have appropriate cutting and welding tools ready to use, including a grinder and clamps for assembly.
Next, measure and cut your materials according to your desired table dimensions-standard sizes range from 30×48 inches to 30×72 inches, depending on your projects. When fabricating the frame, cut lengths for both horizontal and vertical components. Once you have all the pieces ready, begin assembling the frame. Use clamps to hold the frame together firmly before welding. Start by welding the corners, ensuring the table is square. Once the frame is completed, attach the steel plate-the weld seams should be consistent to avoid any warping or stress points.
After assembling your table, you can take steps to increase its versatility and comfort. Consider adding caster wheels for mobility, or side shelves to store tools and materials. A sheet metal edge around the perimeter can help catch spatter and prevent mess. When everything is in its final place, make sure to perform a thorough check of all welds and connections before using your table for any significant projects.
Lastly, always remember safety first. Ensure you’re wearing appropriate protective gear including gloves, a helmet, and heavy clothing while building your table and during subsequent welding work. This project not only strengthens your skills but also sets the foundation for a seamless welding experience in the future. Enjoy the satisfaction of working on a table you built with your own hands!
Welding Techniques for a Solid Structure
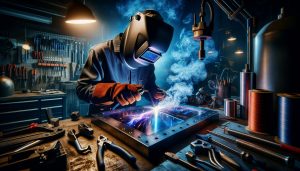
To create a durable and stable welding table, understanding the distinct welding techniques is essential. The choice of method not only impacts the strength of your joints but also influences the overall quality and longevity of your table. Among the most popular welding techniques, MIG (Metal Inert Gas), TIG (Tungsten Inert Gas), stick welding, and flux-cored arc welding each have unique attributes that cater to various materials and project requirements.
MIG Welding
MIG welding is prevalent for its speed and versatility, making it an ideal choice for constructing a DIY welding table. This method utilizes a continuous wire feed as an electrode, which melts and fuses the metal parts together. It is particularly effective for welding thinner materials, such as sheet metal, and can be easily adjusted for different thicknesses. For a stable tabletop, a solid weld bead is crucial; thus, maintaining a consistent travel speed and angle is essential. With MIG, you will achieve a clean and efficient weld, minimizing the need for post-weld cleanup.
TIG Welding
In contrast, TIG welding allows for greater precision and control, making it suitable for fabricating thicker components like the frame of your table. This technique uses a non-consumable tungsten electrode to create the weld, and it often requires filler material to strengthen the joint. Although TIG welding can be more challenging for beginners, it results in high-quality, aesthetically pleasing welds, especially important when working with stainless steel or aluminum. Adjusting the amperage is vital when switching between different metal thicknesses, ensuring optimal penetration and minimized distortion.
Stick Welding
Stick welding, or shielded metal arc welding (SMAW), remains a reliable choice for heavy-duty applications. While less commonly used for building furniture compared to MIG and TIG, it excels in outdoor environments where wind might affect the shielding gas used in other methods. If your table will be exposed to challenging conditions, stick welding provides robust joints that can accommodate heavy loads. The technique requires slightly more skill, as maintaining an appropriate arc length and angle is vital for achieving strong welds, but with practice, it offers excellent results.
Flux-Cored Arc Welding
Flux-cored arc welding (FCAW) shares similarities with MIG but uses a tubular wire filled with flux instead of solid wire. This method is particularly beneficial for outdoor projects, as it provides its own shielding gas, which protects the weld from contaminants. FCAW is highly effective for thicker materials and can expedite the welding process. However, it tends to leave more slag that requires cleanup, so keep this in mind when selecting this technique for your welding table.
Ultimately, the technique you choose should align with your skill level, the materials at hand, and the intended use of your welding table. Focusing on strong joint quality, regardless of the method, will ensure your DIY welding table remains a reliable workspace for all your future projects. Additionally, always remember to adhere to safety protocols by wearing appropriate protective gear and ensuring your workspace is well-ventilated when performing any welding activities.
Tips for Maximizing Your Welding Table’s Functionality

Maximizing the functionality of your welding table involves thoughtful design and strategic enhancements that cater to your specific welding needs. One of the most impactful adjustments you can make is to incorporate modular work surfaces that allow for different tasks. Including clamping systems, such as T-slot tracks or magnet clamps, can help secure your workpieces in place, providing stability while you weld. This versatility not only streamlines your workflow but also saves time when switching between various projects.
Enhancing Workspace Organization
A well-organized workspace can drastically improve efficiency. Implement storage solutions like pegboards or tool chests nearby to keep tools and accessories within arm’s reach. This reduces the time spent searching for items and allows you to maintain focus on your welding tasks. Additionally, consider integrating a dedicated area for holding consumables such as welding rods, wire, and safety equipment, ensuring that everything is easily accessible during your projects.
Incorporating Height Adjustability
Adjustable height features can greatly enhance comfort and ergonomics while welding. Building adjustable legs or using height-adjustable supports not only allows for a personalized working height but also accommodates various tasks, whether you’re doing intricate work or handling larger materials. This adjustment can help prevent physical strain over extended periods, promoting better posture and reducing fatigue.
Integrating Safety Measures
To maximize functionality, safety should be a priority. Ensure that your welding table includes features such as built-in fire-resistant surfaces or shields to maintain a safe working environment. Regularly inspect your equipment and keep a fire extinguisher nearby. Additionally, integrating a fume extractor or ensuring adequate ventilation will contribute further to a safer workspace, ultimately enhancing your overall productivity.
By considering these strategies, you can create a welding table setup that not only meets your project demands but also enriches your overall welding experience, making each task smoother and more efficient.
Safety Protocols When Working with Welded Projects

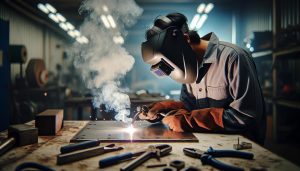
Working with welding equipment comes with inherent risks, which is why emphasizing safety protocols is crucial in any welding project. To mitigate hazards, ensure you are fully equipped with the appropriate personal protective equipment (PPE). This includes not only a high-quality welding helmet with the correct lens shade but also flame-resistant clothing, gloves, and safety boots. Using protective eyewear that offers side shields can also guard against sparks and ultraviolet rays. The right PPE creates a barrier against harmful exposures, which is essential for both amateur and professional welders.
Effective ventilation is another key safety measure. Welding processes often produce fumes and gases that can be hazardous to health over prolonged exposure. Setting up your welding table in a well-ventilated area, ideally with a fume extractor or local exhaust ventilation system, significantly reduces the concentration of harmful pollutants in the air. When working indoors, make sure to have windows open and fans directed towards the welding area to improve airflow. For those working with materials that may generate toxic fumes, such as galvanized steel, ensure you’re familiar with Material Safety Data Sheets (MSDS) for appropriate handling instructions.
Understanding the specific dangers associated with various welding techniques is equally important. For instance, MIG and TIG welding require a clean work environment to prevent contamination, while stick welding generates slag that can lead to slipping hazards. Always keep your work area tidy and free from clutter, as fallen tools and materials increase the risk of accidents. Additionally, establish clear boundaries in your workspace to maintain a safe distance from non-essential personnel during operations.
Finally, ensure you have firefighting equipment readily available. Keep a fire extinguisher nearby and make sure it’s suitable for metal and electrical fires. It’s essential to conduct regular safety drills to ensure that everyone involved in the welding activity knows how to react in case of an emergency. Proper safety protocols not only protect individuals from injury but also preserve the integrity of the project and workplace, creating an environment where creativity and expertise can thrive without compromise.
Customizing Your Welding Table with Accessories
When designing a welding table, consider that its functionality can be significantly enhanced with the right accessories, tailored to fit your specific needs. A well-equipped workspace not only improves efficiency but also elevates the safety and precision of your welding projects. Accessories can range from simple additions that facilitate more organized work to specialized tools that expand your welding capabilities.
Essential Accessories for Your Welding Table
To maximize the utility of your welding table, consider integrating these accessories:
- Vise: A sturdy bench vise allows you to clamp materials securely, providing both hands-free operation and precise control while welding.
- Welding Magnets: These handy tools help in positioning metal pieces at the perfect angles, ensuring accuracy in assemblies. You can find various shapes and strengths that cater to different project requirements.
- Tool Holders: Simple dowel pins or magnetic strips can keep your most used tools readily accessible without cluttering your workspace.
- Clamp Table: Implementing a clamp table section facilitates the attachment of different workpieces, allowing for versatile configurations tailored to each specific weld.
- Electrode Holder and Wire Feed Holder: Designated holders for your electrodes and wire feed can streamline your workflow and prevent unintentional damage to those materials.
Creating a Modular Setup
For those who often take on varied welding projects, a modular accessory setup is ideal. This could include interchangeable tabletop surfaces, like a grid plate for TIG welding or a flat plate for MIG work. Each surface can be easily swapped out, depending on the welding technique being employed, ensuring that the workspace is always optimally configured for the job at hand. Additionally, consider using foldable shelves or side extensions that can be collapsed or unfolded, providing extra workspace only when it’s needed.
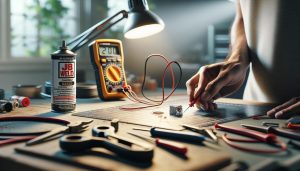
Upgrading with Technology
Incorporating technology can further enhance your welding experience. Consider a magnetic welding table that not only holds components at precise angles but also helps in maintaining alignment as you weld. Digital measuring tools and laser alignment systems can ensure that your projects maintain accuracy during complex assemblies.
When customizing your welding table, keep ergonomics in mind; ensure that any accessory or added feature enhances your natural workflow rather than interrupting it. Each improvement should be geared toward making your welding process smoother, safer, and more efficient, enabling both novice and experienced welders to achieve professional results while enjoying the craft.
Budget-Friendly Upgrades for Your Setup
Finding effective upgrades for your DIY welding table that won’t strain your budget can significantly enhance your work experience without breaking the bank. With a few thoughtful additions, you can transform a basic setup into a highly efficient and functional workspace. Here are some cost-effective enhancements that maintain both safety and productivity.
One of the most impactful upgrades is investing in a mobile base for your welding table. Utilizing wheels can make your setup much more versatile. With a mobile base, you can easily reposition your table for better lighting or accessibility, creating a safer and more accommodating environment. You can often repurpose old furniture wheels, saving costs while improving functionality.
Additionally, consider incorporating storage solutions without spending too much. Simple wooden crates or repurposed bins can provide easy access to tools and materials. Attaching a pegboard above your table can keep essential items like clamps, gauges, and tools organized and within reach. This approach not only declutters your workspace but also promotes safety by reducing the risk of tripping over tools left on the floor.
Another budget-friendly upgrade is using magnetic tool holders or a strip of magnetic tape. This simple addition can keep your most-utilized tools at hand and minimize workspace clutter. Magnetic items are particularly helpful when working with ferrous materials, allowing for quick access to tools as you move between different tasks.
Lastly, consider enhancing your table surface with replaceable sheets made from materials like plywood or steel. A replaceable surface not only increases durability but also allows you to maintain a clean working area. Keeping a few spare sheets on hand can be an economical way to extend the life of your welding table while ensuring optimal working conditions for various welding techniques.
By implementing these budget-friendly upgrades, you can create a professional-grade welding table setup that suits your needs while staying within the $200 threshold. Each enhancement contributes to a more organized, functional, and enjoyable working environment, essential for achieving precision in your welding projects.
Common Mistakes to Avoid When Building
Building a DIY welding table can be an exciting project, but it’s easy to make mistakes that can affect the functionality and safety of your setup. One common pitfall is neglecting to consider the table’s dimensions regarding your workspace and welding projects. If your table is too small, you may find it challenging to accommodate larger pieces, while an overly large table can consume valuable space. Aim for a size that balances utility and the available floor plan.
Another mistake is using inadequate or inappropriate materials for the table’s construction. Many first-time builders opt for lighter materials in a bid to save on costs, which can lead to instability during welding operations. Heavy-duty steel or a combination of metal and wood is often preferred, as these materials can withstand the heat and stress of welding without warping or bending. It’s crucial to ensure your design can handle the weight of the items you’ll be working on.
Additionally, many overlook the importance of a flat and level surface, which is vital for precision when working on projects. A warped table can lead to misaligned welds and poor quality in final jobs. Conduct a thorough check with a level after constructing the frame and surface. If necessary, use shims or adjust your table legs to achieve the right height and level of stability.
Lastly, safety protocols are sometimes sidelined, which can lead to severe injuries. Always remember to incorporate safety features, such as fire-resistant materials, proper ventilation if working with toxic fumes, and secure clamping mechanisms to hold your workpieces in place. Regularly inspect the table for wear and tear, ensuring it’s safe for repeated use over time. By avoiding these common mistakes, you can build a functional, secure, and effective welding table that enhances your DIY projects and contributes to better welding outcomes.
Maintenance Tips for a Long-Lasting Welding Table
To ensure a long-lasting welding table, regular maintenance is crucial. A well-maintained table not only provides a safer workspace but also guarantees precision and stability in your welding projects. The materials you choose will naturally affect the table’s longevity, and factors like weather, humidity, and frequency of use can impact its condition over time.
Start with a consistent cleaning routine. After each project, remove any spatter or slag using a soft wire brush or a scraper, as buildup can warp the table surface and affect future welds. Regularly check for rust, especially if your welding table is exposed to moisture or harsh environments. A simple application of penetrating oil can help prevent corrosion; consider using a rust inhibitor for additional protection.
Regular Inspections
Frequent inspections can identify potential issues before they escalate. Look for signs of wear, such as cracked welds or loose joints, and address them immediately. Ensure that the tabletop remains flat and level; if it begins to warp, you may need to grind or replace sections. Reassess the stability of adjustable legs or mounts and tighten any loose bolts to maintain a solid foundation.
Protective Measures
Utilizing protective coverings when not in use can further extend the life of your welding table. Heavy-duty tarps or specialized covers shield against dust, debris, and moisture. Additionally, keep your workspace organized; maintaining a clean area reduces the likelihood of accidents that could physically harm your table.
By prioritizing maintenance through cleaning, inspections, and protective measures, you are investing in a reliable and durable welding table that enhances both safety and performance for all your projects.
Expanding Your Skills: Advanced Welding Projects
Expanding your welding skills into advanced projects not only enhances your craftsmanship but also opens up new creative avenues for innovative designs. Tackling advanced welding projects can elevate your proficiency with techniques such as MIG, TIG, and stick welding, enabling you to work with a variety of materials like steel, aluminum, and even stainless steel. Here are some project ideas and methods to expand your experience.
One exciting advanced project is fabricating metal furniture. This can range from simple tables and chairs to more intricate designs, such as shelving units or decorative art pieces. Using MIG welding for steel furniture is ideal due to the speed and ease of creating strong welds. When working with aluminum, consider TIG welding for cleaner seams and better aesthetic finishes. Start with a detailed design plan, ensuring that your dimensions are accurate and suited to the materials you will use; this will save time and material while producing impressive results.
Another worthwhile venture is to create custom metal art or sculptures. This allows for great expression and creativity while challenging your welding ability. When sculpting, be prepared to use various welding formats and even explore flux core welding for outdoor pieces that will face the elements. Experiment with different finishes, like powder coating or patinas, for a unique touch that will showcase your skills.
For those looking to get more technical, consider building a custom tool or storage rack. This project can refine your skills in designing functional pieces that optimize space in your workshop. Utilize heavier gauge steel for stability, employing methods learned from earlier projects to construct something not only functional but visually appealing. This project encourages practical application of welding techniques while promoting better organization within your workspace.
Lastly, explore the world of repair projects, such as fixing cracked frames or machinery parts. This work reinforces the importance of welding precision and strength. Understanding the nuances of the different techniques for various materials helps in selecting the right approach for each fix. As you work on real-world repair projects, you’ll deepen your understanding of metallurgy and how materials react during welding processes.
In summary, pursuing advanced welding projects encourages skill refinement and innovation. Whether it’s fabricating furniture, creating metal art, building storage solutions, or making repairs, each project expands your welding repertoire and expertise. Always keep safety protocols in mind, ensuring proper gear is worn, and your workspace is organized to maintain a safe and productive environment.
Exploring Different Welding Techniques for Various Materials
When it comes to building your own welding table, understanding the various welding techniques applicable to different materials is crucial for achieving a professional finish. Welding is not a one-size-fits-all approach; each material demands specific methods to ensure structural integrity and aesthetic appeal. Mastering these techniques not only enhances your skills but also equips you to tackle a wider range of projects.
MIG Welding
Metal Inert Gas (MIG) welding is often favored for its speed and versatility, making it an excellent choice for projects involving mild steel or stainless steel. With MIG, a continuous wire feed provides a reliable arc, resulting in strong welds with minimal cleanup. This method is particularly suitable for constructing the frame of your welding table, as it allows for the rapid assembly of multiple joints without extensive preparation. For beginners, MIG welding offers a forgiving process, allowing for adjustments while learning how to control heat and speed.
TIG Welding
Tungsten Inert Gas (TIG) welding stands out for its precision and control, making it ideal for aluminum and thin materials where heat distortion is a concern. This technique utilizes a non-consumable tungsten electrode and requires the addition of filler rod manually. For those creating intricate designs or working with decorative items on their table, TIG offers cleaner seams and finer details. However, TIG welding does require a higher skill level, as it demands coordination between the torch and filler rod while maintaining a steady pace.
Stick Welding
Stick welding, or Shielded Metal Arc Welding (SMAW), offers robust penetration and is suitable for thicker materials. Although it may generate more spatter compared to MIG or TIG, it is invaluable for outdoor projects or repairs in challenging environments. Stick welding is less sensitive to contaminants, allowing for greater flexibility regarding the surface condition of your materials. When constructing a welding table, using stick welding can enhance durability, particularly if your table will be used for heavy-duty tasks.
Flux Core Welding
Flux core welding is highly effective for outdoor work due to its self-shielding properties. It doesn’t require an external gas source, which makes it advantageous for those working in windy or challenging conditions. This technique is particularly useful for joining heavy steel sections, ensuring that your table can withstand rigorous use. However, the process can produce more slag and requires cleaning more carefully post-weld. Integrating flux core techniques can be beneficial for those who prioritize versatility in their welding applications.
In summary, selecting the right welding technique enhances the quality of your DIY projects and ensures that the final product meets both functional and aesthetic standards. As you delve deeper into your welding journey, experimenting with these techniques across various materials will provide invaluable experience, equipping you to create a table that not only serves as a workspace but also stands as a testament to your craftsmanship. Always prioritize safety, employing the appropriate gear and techniques, to protect yourself and achieve stellar results in all your welding ventures.
Faq
Q: What is the best size for a DIY welding table?
A: The ideal size for a DIY welding table depends on your projects. A common dimension is 4×4 feet, providing ample workspace while still being manageable. Make sure to consider your available space and the size of the items you’ll be welding when determining the dimensions.
Q: How do I ensure my DIY welding table is stable?
A: To ensure stability, use sturdy materials like steel or heavy-duty plywood and incorporate a solid frame. Weld all joints thoroughly and consider adding adjustable leveling feet to account for uneven floors. You can refer to the “Choosing the Right Materials for Your Welding Table” section for more guidance.
Q: Can I build a portable welding table on a budget?
A: Yes, you can create a portable welding table for under $200 by using lightweight materials like aluminum or folding legs. Look for used components or DIY solutions to save costs. This approach allows for easy transport while maintaining functionality for your welding projects.
Q: What tools are essential for building a DIY welding table?
A: Essential tools for building a DIY welding table include a welding machine, angle grinder, tape measure, level, and clamps. A drill and various drill bits are also helpful for adding accessories later. This toolkit will help ensure accurate construction and a solid final product.
Q: How can I add storage solutions to my DIY welding table?
A: You can incorporate shelving or drawers under the table for storage. Magnetic tool holders or pegboards attached to the side are also effective for keeping tools organized. Refer to the “Maximizing Your Welding Table’s Functionality” section for more tips on storage ideas.
Q: What are common mistakes to avoid when building a welding table?
A: Common mistakes include underestimating the size needed, using inappropriate materials, and neglecting to weld joints securely. Always plan your build carefully and follow your safety protocols when working with welds to create a sturdy and safe table.
Q: How often should I maintain my DIY welding table?
A: Maintenance of your welding table should occur regularly, ideally after each use. Check for rust, clean any spatter, and ensure all connections are secure. This proactive approach ensures longevity and performance, making it safer for future welding projects.
Q: What are some advanced features I can add to my welding table?
A: Advanced features include integrated lighting, movable clamps, and specialized jigs for repetitive tasks. You might also consider a built-in vise or magnetic tool trays for efficiency. Explore the customization section of your article for further enhancements and ideas.
Future Outlook
You’ve just unlocked the potential to build your very own professional welding table for just $200, ensuring a sturdy foundation for all your MIG, TIG, or stick welding projects. Don’t let hesitation hold you back-join countless hobbyists and professionals who have already upgraded their workspace with this affordable setup. With the right tools and materials like aluminum and steel, you’re well on your way to elevating your welding game.
As you embark on your DIY journey, consider diving deeper into our guides on essential welding equipment reviews and best safety practices. Ready to take your skills to the next level? Explore our additional resources on flux core techniques and career guidance in welding to stay engaged and informed. We invite you to share your progress and questions in the comments below-your experience could inspire many. Let’s keep the sparks flying!