Welding a muffler is a vital skill for anyone looking to fix exhaust leaks quickly and effectively-often in just 30 minutes. A faulty muffler can lead to increased noise, decreased fuel efficiency, and emission issues, turning a minor annoyance into a costly problem. By mastering the basics of welding, whether using MIG, TIG, or stick techniques, you not only save money on repairs but also gain the confidence to tackle future automotive challenges. This guide will walk you through the essential steps and safety protocols necessary to perform the job right, ensuring a reliable fix that enhances your vehicle’s performance. Dive in to discover how simple it can be to restore that peaceful drive while prolonging the life of your exhaust system.
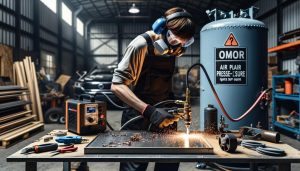
Essential Tools for Welding a Muffler
When it comes to welding a muffler, having the right tools at your disposal is crucial for achieving a strong, durable joint. The ideal setup not only enhances your efficiency but also ensures the quality of your work. For instance, a MIG welder is typically the preferred choice for most exhaust systems due to its versatility and ease of use. This process allows for quick welds with minimal cleanup, perfect for those who may be inexperienced. However, if you’re dealing with stainless steel, a TIG welder might be advantageous since it provides precise control over the heat and weld pool, resulting in cleaner and more aesthetically pleasing welds.
In addition to the welder, several other tools are essential for a successful muffler repair. Here’s a list of must-have items:
- Welding Helmet: Protects your eyes and face from the intense brightness of the arc and spatter.
- Welding Gloves: Ensure your hands are protected from heat and sharp materials.
- Angle Grinder: Useful for cleaning metal surfaces to ensure a strong weld and for smoothing down welds afterward.
- Welding Rods or Wire: Choose appropriate rods or wire based on the materials being welded; for mild steel, ER70S-6 is a popular choice for MIG welding.
- Clamps: Keep parts steady and aligned during the welding process, which is vital for making precise welds.
- Metal File: For deburring and smoothing edges after cutting or welding.
Before you start, ensure that your workspace is clean and well-ventilated to avoid any hazards associated with welding fumes. Checking your equipment’s condition is also crucial; worn-out parts can lead to poor weld quality and unsafe conditions. Investing in these essential tools will not only bolster your confidence as a welder but also increase the longevity and performance of your repaired muffler.
Step-by-Step Process to Fix Exhaust Leaks
Identifying and repairing exhaust leaks can be an essential part of maintaining your vehicle’s performance, as leaks can lead to decreased efficiency, increased emissions, and even health risks due to harmful fumes. To effectively fix an exhaust leak in your muffler, follow these steps closely, ensuring proper equipment and safety precautions.
Start by thoroughly inspecting the exhaust system to pinpoint the location of the leak. Look for signs such as rust, holes, or excessive noise, which can indicate where the escape of gases might be occurring. Once identified, clean the area around the leak using an angle grinder or wire brush to remove any dirt, rust, or old exhaust material, providing a clean surface for welding.
Now that the area is prepared, secure the muffler using clamps to hold it in place, preventing any movement that could weaken the weld or create additional gaps. Select your welding method based on the materials; for most mufflers made from mild steel, a MIG welder would be suitable, while stainless steel will require a TIG welder for a more precise finish. Adjust the welder settings according to the material thickness to ensure optimal penetration and avoid blow-through.
As you proceed with welding, maintain a steady hand and an adequate distance from the weld pool. Start at one end of the leak, moving the welder slowly along the seam to create a solid bead. Ensure the heat is consistent, allowing it to flow evenly into the metal for a strong bond. After completing the weld, allow it to cool then inspect it visually to ensure complete coverage and no gaps.
Before putting everything back together, take an extra step to double-check your work. Use a metal file to smooth out any rough edges around the weld for a cleaner finish. Finally, perform a post-repair inspection by running the vehicle and listening for any signs of leaks, confirming the repair’s success. This method not only fixes the exhaust leak but also enhances the longevity of your modified muffler system.
Choosing the Right Welding Method for Your Muffler
When it comes to effectively repairing a muffler and addressing exhaust leaks, the choice of welding method plays a crucial role in ensuring a strong and durable fix. Each welding technique offers distinct advantages and is suited for specific materials commonly found in exhaust systems, such as mild steel and stainless steel. Understanding the properties and applications of MIG, TIG, and other welding methods not only enhances the quality of the repair but also contributes to the longevity of the welded joints.
MIG (Metal Inert Gas) welding is a popular choice for most masonry exhaust systems due to its speed and versatility. This process uses a continuously fed wire electrode, which allows for swift and efficient welds-ideal for intricate and tight spaces in a muffler. MIG welding is particularly effective on mild steel, making it the go-to option for many DIY enthusiasts and professionals alike. The adaptability of MIG systems often leads to cleaner welds with minimal spatter, ensuring a smoother finish that can be critical in exhaust applications.
In contrast, TIG (Tungsten Inert Gas) welding is favored for stainless steel mufflers and components, where precision is paramount. This technique utilizes a non-consumable tungsten electrode, providing greater control over the welding process, which is essential when working with thinner materials or intricate designs. TIG welding creates high-quality and aesthetically pleasing welds, which can withstand the harsh conditions of exhaust systems without compromising integrity. Although it requires more skill and practice than MIG welding, the results often justify the investment of time and effort, especially for high-performance exhaust solutions.
For those who may encounter thicker materials or specific applications like cast iron, stick welding (SMAW) or flux core welding can also be considered. Stick welding is advantageous for its portability and ability to work in outdoor conditions but may require further cleanup due to slag. Flux-cored arc welding (FCAW) offers similar benefits to MIG but can function without an external shielding gas, making it suitable for outdoor applications where wind might disperse gas shields. Each of these methods has its strengths, making it essential for a welder to select the technique that aligns with their level of expertise, the specific materials involved, and the desired outcome for the muffler repair.
Ultimately, choosing the right welding method will not only facilitate a successful repair but also ensure that your muffler operates efficiently and safely. By considering factors such as material type, the complexity of the repair, and skill level, you can make an informed decision that leads to a seamlessly welded exhaust system.
Safety Precautions When Welding Exhaust Systems
Welding exhaust systems presents unique challenges, largely due to the materials involved and the environment in which exhaust components operate. Understanding the inherent risks and implementing rigorous safety measures is crucial for anyone involved in this task. Proper ventilation is one of the most critical aspects of welding safety. As exhaust systems often contain residues from hydrocarbons, welding can release toxic fumes and carcinogens. Working in an area with adequate airflow, or using extraction systems, can significantly reduce inhalation risks.
Another safety priority is personal protective equipment (PPE). A reliable welding helmet with appropriate shade, gloves made from heat-resistant materials, and flame-retardant clothing are foundational elements in ensuring safety during welding activities. Additionally, protective footwear can guard against falling objects and molten metal. Eye protection should meet the ANSI Z87 standard, and respirators may be necessary if adequate ventilation cannot be ensured, particularly when dealing with older exhaust systems that may have been exposed to different environmental elements.
Before beginning any welding project, it’s essential to thoroughly inspect the work area and equipment. Any flammable materials should be removed or shielded, and the welding machine and leads must be in good condition to prevent electrical hazards. Furthermore, if working with stainless steel or other alloys, one should be cognizant of the potential for chromium and nickel exposure, which can have long-term health effects if safety protocols are not followed.
Lastly, always be prepared for emergencies. Have a fire extinguisher nearby, and ensure that anyone present is aware of the safety protocols in case of an accident. Regular training on both equipment operation and emergency procedures is beneficial, fostering a culture of safety that extends beyond individual projects. By prioritizing these safety precautions, welders can not only protect themselves but also enhance the overall quality and integrity of the work being performed on exhaust systems.
Common Muffler Issues and Solutions
Worn-out mufflers can cause a range of issues, from increased noise levels to decreased fuel efficiency. Understanding common muffler problems and their solutions can make the difference between a minor repair and a costly overhaul. The most prevalent dilemmas typically stem from rust, loose connections, and exhaust leaks, often exacerbated by road salt, moisture, and age. Addressing these issues promptly can extend the life of your exhaust system and safeguard your vehicle’s performance.
Common Muffler Problems
- Rust and Corrosion: Mufflers are often made from steel, which can corrode when exposed to moisture and road salt. This deterioration leads to perforations that can cause exhaust leaks.
- Loose Hangers: Over time, exhaust hangers can become loose, resulting in rattling, vibrations, and even misalignment of the exhaust system.
- Exhaust Leaks: These are typically caused by missing gaskets or welds that have failed, leading to a decrease in engine performance and potential harm to the catalytic converter.
- Noise: An excessively loud muffler can indicate that it needs repair. Mufflers serve the essential function of dampening engine noise, and any alteration usually signifies damage or malfunction.
Solutions to Muffler Issues
Addressing these problems varies based on the nature and severity of the issue. For rusted sections, cutting out the damaged portion and welding in a new piece is often necessary. Using MIG welding is recommended due to its versatility with various metals and ease of use for repairs.
Loose hangers can typically be reattached or replaced without specialized tools. When addressing exhaust leaks, inspecting joint connections is crucial; applying a high-temperature epoxy can seal minor leaks temporarily until more extensive repairs can be performed.
For persistent noise issues, replacing the muffler might be the only effective solution. This involves cutting the old muffler out and welding in a new unit, ensuring proper alignment for optimal exhaust flow. Additionally, always check the health of the entire exhaust system during repairs to prevent recurring issues.
Understanding these common muffler issues and employing effective solutions can not only improve vehicle performance but also offer a satisfying and rewarding experience for the welder, whether a novice or seasoned professional.
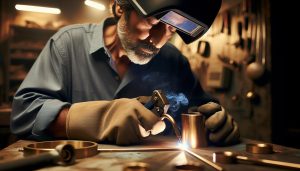
Tips for Achieving a Strong Weld Join
Achieving a robust weld join is critical when working on components like mufflers, where structural integrity directly influences performance and durability. A clean, well-executed weld not only prevents leaks but also ensures that your exhaust system operates efficiently. Start by preparing the surfaces to be welded; rust, paint, and debris can significantly impair the quality of your weld. Use a wire brush or grinder to clean the metal thoroughly, exposing shiny, bare metal to allow for optimal fusion. This preparation step is essential for any welding technique, whether you’re employing MIG, TIG, or stick welding.
When it comes to selecting the right welding method, MIG (Metal Inert Gas) welding is often favored for exhaust repairs due to its speed and ease of use. It allows for good penetration, which is vital when welding thicker sections of steel commonly found in mufflers. Adjusting your settings according to the material is crucial-ensure your voltage and wire feed speed are calibrated correctly to prevent undercutting or burn-through. For thinner materials, such as the tubing found in some mufflers, using a shorter stick-out can help minimize the heat input, thus reducing the risk of warping.
During the welding process, maintaining a consistent travel speed is key. Too fast, and the weld might lack sufficient penetration; too slow, and you risk excessive buildup that can lead to weaknesses. If you’re welding in position, like on a vehicle lift or a jack stand, consider your angle carefully to ensure gravity doesn’t pull molten metal away from the joint. A well-formed bead should be smooth and even, reflecting the adequacy of your technique and preparation.
Don’t overlook the importance of post-weld cleanup and inspection. After the weld cools, inspect it visually for defects such as cracks or inclusions. Performing a simple water test can help reveal leaks that may not be immediately visible. If issues do arise, using a high-temperature sealant on minor leaks can serve as an interim solution, ensuring your muffler functions correctly while planning for a more permanent repair if needed. By following these tips, you can enhance the strength and longevity of your welded joints, ensuring a reliable exhaust system.
How to Prepare Your Muffler for Welding
Preparing a muffler for welding is a critical step that can significantly impact the quality of your final weld and the overall performance of your exhaust system. Proper preparation ensures that the surfaces are clean and free from contaminants, which is essential for achieving a strong, durable bond during the welding process. Start by removing any rust, dirt, grease, or old paint from the area to be welded. A wire brush, grinder, or even a chemical rust remover can effectively clean the metal, revealing shiny, bare surfaces that are ideal for welding. This meticulous cleaning process minimizes the risk of impurities weakening the weld.
Next, assess the alignment of the muffler components. Misalignment can lead to stress and eventual cracking of the weld, so ensure that parts fit snugly together. If working with pre-made parts, it may be necessary to trim sections to achieve a better fit. Utilize clamps to hold the parts in place while you prepare to weld. This not only makes the process easier but also ensures that everything stays in the correct position, allowing for a more accurate and cleaner weld.
When preparing for welding, it’s also essential to take into consideration the type of material used in the muffler. Most mufflers are made of mild steel or stainless steel. Each material requires different considerations: stainless steel, for example, necessitates a clean area free of significant oxidation to prevent contamination during welding. Depending on your experience level, choosing the right filler material is also crucial, especially if you are using techniques like MIG or TIG welding, where matching the filler to the base metal can enhance the overall strength of the weld.
Lastly, don’t forget to implement proper safety measures while preparing for welding. Ensure you’re wearing appropriate protective gear, such as gloves, goggles, and a welding helmet, to shield yourself from sparks and UV radiation. Make sure your workspace is well-ventilated to avoid the buildup of harmful fumes. By following these steps in preparation, you set the stage for a successful welding process, ultimately resulting in a more reliable and efficient exhaust system.
Troubleshooting Common Welding Problems
It’s not uncommon for even seasoned welders to encounter difficulties during the welding process, particularly when fixing exhaust leaks in mufflers. Addressing common welding problems swiftly can prevent further damage and ensure the integrity of your repair. Identifying issues such as poor penetration, excessive spatter, or overheating is crucial to maintaining the strength of your weld.
One frequent issue is insufficient penetration, which can result from improper settings on MIG or TIG welding machines. To resolve this, ensure that the voltage and wire feed speed are correctly adjusted for the thickness of the metal being welded. If the material is too thick and not thoroughly cleaned, consider increasing the heat or using a more suitable filler material. Additionally, maintaining a consistent travel speed will allow for better penetration and a more solid joint.
Excessive spatter is another common problem that can lead to an unsightly finish and potential weak spots. This issue often arises from using incorrect wire types or flawed gas settings. Check that you are utilizing the right shielding gas for the material and welding process. Fine-tuning your gas flow and ensuring a clean torch can significantly reduce spatter. If spatter persists, consider adjusting the technique or moving more smoothly along the weld joint.
Overheating can warp the muffler material, especially if working with thinner metals. To avoid this, practice proper heat management by alternating between welds and allowing the material to cool down. Using a pulse technique in TIG welding can help manage heat input while providing good control over the weld pool. Recognizing these common issues not only improves the quality of your welds but also boosts your confidence as a welder and ensures long-lasting repairs.
In summary, staying mindful of your machine settings, maintaining clean parts, and controlling heat input are pivotal in effectively. By implementing these strategies, you’ll not only fix exhaust leaks more efficiently but also enhance your overall welding skill set.
Maintaining Your Welded Muffler for Longevity
Taking care of a welded muffler can significantly enhance its lifespan and performance, ensuring that you get the most out of your hard work. Proper maintenance not only preserves the integrity of the weld but also keeps your exhaust system functioning efficiently. Regular inspection and upkeep can help catch potential issues early, avoiding costly repairs down the line.
Start by routinely checking the welded areas for any signs of rust or corrosion. Contaminants such as road salt and moisture can accumulate, especially in regions with harsh weather conditions. If you notice any rust, use a wire brush to remove it. After cleaning, apply a high-temperature paint or a protective coating specifically designed for exhaust systems. This not only enhances aesthetics but also provides a barrier against moisture and corrosive elements.
Additionally, ensuring the tightness of all connections is vital. Loose fittings can lead to exhaust leaks, which can increase emissions and reduce efficiency. Periodically inspecting the hangers and mounting points will help maintain the optimal position of the muffler and exhaust pipes, reducing the risk of vibrations that might compromise the welds over time. If any hangers appear worn or damaged, replace them to maintain proper support.
Lastly, consider the environmental factors affecting your vehicle. If your driving conditions frequently expose the exhaust system to gravel roads, mud, or debris, a more frequent maintenance routine may be necessary. Keeping the muffler and surrounding areas clean not only allows for easier inspections but also helps identify any emerging problems before they become more serious. By following these simple yet effective maintenance practices, you can prolong the life of your welded muffler and ensure it continues to perform optimally.
When to Seek Professional Help for Muffler Repairs
Finding the right moment to call in a professional for muffler repairs can save both time and potential further damage to your vehicle. While DIY repairs can be fulfilling and cost-effective, some situations demand the expertise that only a trained technician can provide. When the complexity of the issue goes beyond a simple fix, seeking help can prevent escalating costs and ensure your exhaust system functions properly.
If you encounter severe exhaust noise, vibrations, or persistent leaks after a repair attempt, these could be indicators that the issue is more complex. An incorrectly aligned exhaust system or a improperly executed repair may not only fail to solve your problem but also lead to safety risks. In cases where structural integrity is compromised, particularly with older vehicles experiencing rust, it’s best to have a professional assess the situation. They can provide solutions such as replacement of components versus attempted repairs, which could prove more economical in the long run.
Additionally, consider professional assistance if you’re unsure about the welding techniques required for your specific muffler material. Different metals, like aluminum and stainless steel, necessitate unique approaches and equipment. Without the right knowledge or tools-whether utilizing MIG, TIG, or stick welding methods-results can vary significantly and lead to poor joint strength or future failures in the exhaust system. Technicians have the training to not only select the right method but also execute repairs that adhere to manufacturer specifications.
Safety is paramount when working with exhaust systems. Gas leaks can lead to dangerous fumes entering your vehicle cabin, while improper welding can pose fire risks. If you notice unusual smells or suspect potential leaks from the exhaust, opting for professional help is wise. They have the experience to diagnose and remedy issues effectively, using specialized equipment that ensures both safety and quality workmanship. Ultimately, knowing when to call a professional can safeguard your vehicle, ensuring it runs smoothly and efficiently for years to come.
Cost Analysis: DIY Welding vs. Professional Repair
The decision to tackle muffler repairs through DIY welding or to call in a professional can significantly impact your wallet and the effectiveness of repairs. Engaging in a DIY approach often appeals due to lower initial costs, but before you grab your welding gear, it’s essential to evaluate both options carefully to determine the best course of action for your situation.
In a DIY scenario, the expenses primarily revolve around equipment and materials, which can vary widely based on the welding method chosen-MIG, TIG, or stick welding each requires different settings and gear. If you already own basic welding equipment and safety gear, your costs may only involve purchasing welding rods or filler material specific to your muffler’s metal, like steel or aluminum. However, acquiring the right tools, such as a quality welding machine, protective gear, and effective cleaning supplies can quickly add up.
On the other hand, opting for professional repair can seem more expensive upfront; however, it often translates to long-term savings. Skilled technicians possess the expertise to make precise welds that ensure structural integrity, especially crucial when dealing with exhaust systems prone to heat and stress. Professionals also have access to specialized equipment that may not be feasible for a casual user to purchase. Moreover, most professionals provide warranties on their work, offering peace of mind that repairs will meet or exceed industry standards without the risk of repeat issues or additional costs arising from mistakes.
When weighing the costs, consider these factors:
- Skill Level: Are you comfortable undertaking the job, or do you possess the necessary welding skills?
- Time Investment: DIY fixes can take longer, especially if you’re learning on the go. Consider the value of your time.
- Long-term Implications: Will a poor DIY weld compromise safety or lead to additional repairs down the line?
- Material Costs: Do you have the right materials on hand, or will you need to make additional purchases?
Ultimately, choosing between DIY welding and professional repair for a muffler boils down to balancing cost, skill, and the specific demands of your vehicle. If you are confident in your abilities and possess the right tools, DIY can be rewarding both financially and practically. However, for complex issues or if you’re unsure about the welding process, investing in a professional may result in better safety and overall satisfaction.
Upgrading Your Muffler System Post-Repair
After successfully welding your muffler and addressing any immediate exhaust leaks, it’s a prime opportunity to enhance your vehicle’s muffler system. Upgrading can improve performance, increase durability, and even elevate your vehicle’s sound quality. Many drivers overlook this step, focusing solely on repairs, but optimizing your exhaust system can yield significant long-term benefits.
One of the first considerations when upgrading is the material of the muffler itself. While factory-installed mufflers often use standard steel, aftermarket options made from stainless steel or aluminum can offer increased resistance to corrosion and better longevity. Additionally, these materials can influence the tone and volume of the exhaust. For instance, stainless steel tends to provide a deeper, more resonant sound while maintaining a sleek appearance. Investing in a high-quality muffler not only complements your repair work but can enhance the overall life of your exhaust system.
Another crucial factor is the design of the muffler. Different designs cater to various performance needs, whether you’re aiming to maximize flow for improved horsepower or seeking a quieter ride. Performance mufflers, like chambered designs, allow for greater exhaust flow, thus enhancing engine efficiency. Alternatively, if noise reduction is paramount, look for mufflers specifically engineered for quiet operation. Each choice affects not only the functionality of your vehicle but can also modify emissions, making it worth considering alternatives that comply with local regulations.
Lastly, don’t neglect the importance of proper installation following an upgrade. Ensure all connections are tight, using high-temperature gaskets where needed to prevent leaks, as any gaps can negate the advantages of your new muffler. Regular maintenance, including checking for corrosion or damage, is vital for maintaining performance over time. isn’t just about immediate fixes; it’s an investment in your vehicle’s performance and reliability for years to come.
Faq
Q: What materials are best for welding a muffler?
A: For welding a muffler, stainless steel and mild steel are the best materials due to their resistance to rust and heat. Stainless steel offers higher durability while mild steel is easier to work with. Ensure you select the appropriate rods or wire for the welding method used.
Q: How do I know if my muffler needs welding?
A: Signs that your muffler needs welding include excessive exhaust noise, visible rust or holes, and a drop in engine performance. If you notice leaks or hear hissing sounds, it’s likely time to assess the muffler for potential welding repairs.
Q: Can I use any welding technique for muffler repairs?
A: While several techniques can repair mufflers, MIG welding is often preferred for its ease of use and speed. TIG welding provides more control and is suitable for stainless steel, while stick welding can also be effective, but may require more skill.
Q: How long does it take to weld a muffler?
A: Welding a muffler generally takes between 30 minutes to 1 hour, depending on the extent of the damage and your skill level. Preparation and setup time can additional affect overall project duration.
Q: What should I do if my welds are failing?
A: If your welds are failing, check for proper surface preparation, adequate heat settings, and correct welding technique. Ensure you’re using the appropriate filler material. Reviewing tips on achieving a strong weld join can also help troubleshoot issues.
Q: Is it safe to weld a muffler at home?
A: Yes, it is generally safe to weld a muffler at home if you follow proper safety protocols, including using PPE, ensuring good ventilation, and working in a safe area. Familiarizing yourself with safety precautions is essential for a successful and hazard-free job.
Q: What is the cost difference between DIY muffler welding and hiring a pro?
A: DIY muffler welding can cost between $30-$100 for materials, while professional services typically range from $100 to $300. Cost analysis on DIY vs. professional repair may help you decide based on your budget and skill level.
Q: How do I maintain my welded muffler for longevity?
A: To maintain your welded muffler, regularly check for rust, clean it to remove debris, and apply a high-temp paint to protect against corrosion. Additionally, ensure proper exhaust system alignment to prevent additional stress on the welds.
In Conclusion
Now that you’ve learned how to weld a muffler and fix those pesky exhaust leaks in just 30 minutes, take action now to enhance your vehicle’s performance and efficiency. Remember, a well-welded muffler not only improves sound but can also extend the life of your exhaust system. For more detailed techniques, don’t miss our guides on MIG and TIG welding, which can elevate your skills to the next level.
If you still have questions or need expert advice, consider reaching out to us for personalized support. Explore our blog for essential safety protocols, recommended equipment reviews, and additional welding tips to further your knowledge. Your next project is just around the corner-let’s keep your welding journey going strong! Don’t forget to share your success stories in the comments below and subscribe for more welding insights and techniques!