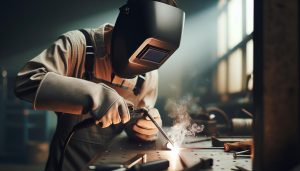
Imagine turning an ordinary microwave into a powerful plasma cutter-a tool traditionally reserved for professional workshops. This DIY project not only showcases your innovative side but also equips you with a versatile cutting tool for various materials, whether you’re a hobbyist or a seasoned welder. Understanding how to create a plasma cutter from a microwave can unlock new possibilities in metalwork, helping you tackle projects that require precision and creativity. By embarking on this journey, you’ll gain valuable insights into plasma technology, along with practical welding techniques that can enhance your skills. Safety is paramount in such endeavors, and this guide will navigate you through each step with caution and expertise, ensuring that you can pursue your welding goals with confidence. Prepare to transform everyday items into extraordinary tools and elevate your DIY game!
How Plasma Cutters Work: Understanding the Basics
To grasp the intricacies of plasma cutting, one must first understand the fundamental principle behind this powerful tool. Plasma cutting employs a focused stream of ionized gas, or plasma, to melt through electrically conductive materials, typically metals like steel and aluminum. The process initiates when an electrical arc is created between an electrode and the workpiece, resulting in the gas being heated to extremely high temperatures, often exceeding 20,000 degrees Fahrenheit. This transition creates a torch-like effect, allowing the ionized gas to efficiently slice through thick materials with precision.
Plasma cutters operate based on the principle of constricting a jet of air or an inert gas, drawing it through a narrow nozzle alongside an arc. This method enhances the cutting speed and quality while providing a cleaner finish than traditional cutting methods. Factors such as the type of gas used (commonly air, nitrogen, or argon) and the current settings play significant roles in determining the effectiveness of the cut. For various materials and thicknesses, adjusting parameters is crucial; for instance, thicker sections may require higher amperage to ensure a proper cut without excessive slag buildup.
Understanding the components is essential for anyone attempting a DIY plasma cutter project, especially if derived from unconventional devices like a microwave. Key components typically include a high-voltage transformer, a gas supply system, and safety controls to manage the arc. Properly assembling these elements not only affects performance but also significantly impacts overall safety. A well-designed unit must include features like over-current protection and ventilation systems to mitigate heat buildup during operation.
Whether for hobbyist projects or professional fabricating, comprehending how plasma cutters work sets a solid foundation for mastering the craft. Such knowledge not only enhances the user’s ability to make informed decisions regarding settings and materials but also fosters innovations in DIY designs, like repurposing a microwave for plasma cutting.
Gathering Materials: What You’ll Need
Building a plasma cutter from a microwave is not only an innovative project but also an engaging way to repurpose technology that might otherwise go unused. To embark on this journey, you’ll need a specific set of materials that will allow you to safely and effectively construct your device. Gathering these components beforehand is crucial to ensure a seamless assembly process and prevent any interruptions along the way.
Start with acquiring a microwave transformer. This component serves as the heart of your plasma cutter, converting the standard low voltage into the high voltage necessary for creating the electrical arc. Look for transformers from disused microwaves; these are widely available and perfect for your project. Next, you’ll need a gas supply system, which can consist of compressed air or an inert gas like argon. A simple air compressor or a gas tank can provide a steady flow, which is essential for maintaining the plasma stream during cutting.
In addition to the main components, you will also require electrodes and nozzles. Electrodes are typically copper and will need to handle high temperatures, while nozzles direct the flow of plasma to make precise cuts. Ensure that you choose nozzles that match the intended thickness of the materials you plan to cut.
Furthermore, safety equipment cannot be overlooked. Stock up on protective gear such as gloves, a welding helmet, and flame-resistant clothing. Although the thrill of crafting your own plasma cutter can be enticing, engaging in this work without the proper personal protection equipment (PPE) can lead to serious injuries.
Finally, gather various tools and materials that will make the assembly and operation easier, including:
- A multimeter for electrical measurements
- Wiring and connectors suited for high voltage
- Heat-resistant insulating materials
- A sturdy table or workbench for assembly
- Clamps to secure your workpieces during cutting
By ensuring that you have all these materials at hand before starting, you’ll set a solid foundation for your DIY plasma cutter project, minimizing risks and enhancing your experience in the workshop.
Safety First: Essential Precautions When DIYing
When constructing a homemade plasma cutter, prioritizing safety is paramount. Plasma cutters operate at extremely high voltages that can pose serious risks if proper precautions aren’t taken. Familiarizing oneself with these safety measures will not only protect the individual building the cutter but also ensure a secure environment for anyone nearby. Engaging with electrical components and high-temperature equipment requires a disciplined approach, with a commitment to following safety protocols throughout the entire process.
Always start by wearing appropriate personal protective equipment (PPE). A welding helmet equipped with a suitable filter is crucial to safeguard your eyes from the intense light generated during plasma cutting. Additionally, flame-resistant clothing is a must-this includes gloves that are specifically designed to withstand heat and abrasive materials. It’s wise to utilize face shields and protective eyewear as supplementary gear, as well.
Creating a safe work environment is equally important. Ensure that your workspace is well-ventilated to dissipate potentially harmful gases and fumes. Position your materials and tools orderly to minimize the risk of accidents. Establish a safe distance from flammable materials and have a fire extinguisher readily available. Moreover, utilizing tools with insulated grips can help prevent electrical shocks while handling high-voltage connections.
Finally, understanding and respecting the machinery’s operation is vital. Ensure that all components are securely connected before powering up your device and always double-check wiring for signs of wear or damage. During operation, keep a safe distance from the cutting area, and never reach over or into the workspace while the cutter is powered. Incorporating these vital safety measures will not only enhance your confidence when building and using your plasma cutter but will also reinforce a culture of safety that extends beyond individual projects.
Step-by-Step Guide: Building Your Microwave Plasma Cutter
Building a microwave plasma cutter can seem like a daunting task, but understanding the process will demystify this creative DIY project. At its core, a plasma cutter operates by generating a high-temperature plasma arc, which can cut through metals quickly and efficiently. Leveraging the components from a microwave oven allows for a budget-friendly and innovative approach to constructing your own cutter from commonly available materials.
Start by collecting the essential materials for your project. You’ll need a microwave oven, a wire cutter, insulated wires, a transformer from an old microwave, a nozzle or electrode, and suitable shielding gas (like air or argon) depending on your cutting needs. A sturdy base to mount your assembly will also be necessary. Ensure that you work in a well-ventilated area and have all safety gear on hand, including gloves, goggles, and appropriate clothing to protect against sparks and electrical hazards.
Begin the assembly process by carefully disassembling the microwave to retrieve the transformer, which is key to stepping up the voltage needed for plasma generation. Properly wire the transformer to a suitable power source while ensuring all connections are insulated to prevent accidental shocks. Connect the electrode and nozzle, ensuring they are secure and positioned correctly to create an arc when power is applied.
Once everything is wired and secure, it’s crucial to test the setup before full operation. Check all connections for integrity, and ensure no flammable materials are nearby. Gradually power up the cutter while monitoring the arc’s stability and adjusting the gas flow as necessary. If the cutter operates smoothly, you’re ready to make clean cuts. Remember, patience and careful adjustments will yield the best results from your homemade plasma cutter.
Testing Your Plasma Cutter: Tips for Safe Operation
Testing your homemade plasma cutter is a critical step that ensures both safety and performance. The ability to create precise cuts hinges on the stability of the plasma arc and your control over its operation. Begin by verifying that all electrical connections are secure and that the system is free from any flammable materials. It’s advisable to conduct your initial tests outdoors or in an open space to mitigate any risks associated with sparks or fumes.
When powering up your plasma cutter for the first time, employ a systematic approach. Gradually increase the power while observing the arc’s behavior. A stable arc is essential for effective cutting; if the arc flickers or dims, it may indicate issues with the gas flow or electrical connections. To optimize performance, adjust the gas flow rate gradually until a steady arc is established. Remember, the type of gas you choose, whether air or argon, will have a significant impact on the cut quality. Air provides a hotter arc for ferrous metals, while argon can enhance control for more intricate work.
Key Points to Consider During Testing:
- Monitoring Electrical Components: Check for overheating of the transformer and other electrical components to prevent fire hazards.
- Wearing Proper Safety Gear: Always use gloves, goggles, and flame-resistant clothing while testing to protect against potential burns and electrical shock.
- Maintaining Distance: Keep an appropriate distance when igniting the plasma to prevent injury from the arc’s intense light and heat.
- Calibration and Adjustment: Be prepared to make fine adjustments to both the power output and the gas flow based on the cutting material and desired results.
In the testing phase, engage in trial cuts on various scrap metals to gauge the cutter’s efficiency and refine your technique. Observing how the plasma cutter interacts with different materials will aid in setting the correct parameters for future projects. Documenting your findings will improve your understanding of how adjustments affect performance, ultimately leading to cleaner cuts and enhanced satisfaction with your DIY plasma cutter project.
Troubleshooting Common Issues with DIY Plasma Cutters
Creating a DIY plasma cutter from a microwave is an innovative endeavor that can lead to powerful cutting capabilities, but it also comes with its share of challenges. Common issues can arise during the construction and operation phases, and addressing these effectively will enhance both safety and functionality. One prevalent problem is inconsistent arc stability, which can lead to poor cutting quality. If users notice that the arc is flickering or unstable, they should first check the electrical connections and ensure there are no loose wires. Additionally, the gas flow rate may need to be adjusted; too little gas can lead to an erratic arc, while too much can diffuse the plasma, affecting performance.
Another frequent concern is overheating of components, particularly the transformer and the nozzle. Regular monitoring during operation is crucial. If a user finds their components excessively hot to the touch, they may need to pause operations and allow the system to cool down or consider adding additional cooling methods, such as fans. It can also be beneficial to ensure that the components are well-ventilated and that the microwave’s casing is not obstructing airflow.
Fuel quality and type can also play a significant role in functionality. While air is commonly used, there are scenarios where a mix of gases could yield better results, especially with different metals. Experimenting with gas mixtures could alleviate cutting inefficiencies and offer better results depending on the material being processed. Users should maintain a log of the gas types and adjustments made during the testing phase to refine their settings in future projects.
Safety measures cannot be overstated when troubleshooting. In the event of equipment malfunctions, it is essential to seek immediate professional assistance. Flame-resistant gloves and eye protection should always be worn, regardless of whether the user is troubleshooting or operating the cutter. Investing in quality safety gear ensures that even in the event of mishaps, risks are minimized. By focusing on these troubleshooting areas, users can significantly enhance the performance and safety of their homemade plasma cutter, making the DIY process both rewarding and effective.
Comparing Homemade and Commercial Plasma Cutters
When evaluating the capabilities of homemade plasma cutters versus their commercial counterparts, it’s essential to recognize the different strengths and limitations they each offer. Conventional plasma cutters, typically designed for professional use, provide consistent cutting performance, reliability, and the ability to handle a variety of materials with precision. These machines are engineered with advanced technology that enhances stability and efficiency, allowing for clean cuts at various thicknesses. In contrast, a DIY plasma cutter fashioned from a microwave can serve as a cost-effective alternative, particularly for hobbyists or those working on small-scale projects.
One of the most significant distinctions lies in the cutting quality. Homemade plasma cutters, while functional, may not achieve the same level of refinement as commercial models. Users might experience challenges with arc stability and cut quality due to the components’ limitations. In a commercial unit, features like adjustable cutting speeds and specialized nozzles are designed to optimize the plasma jet’s efficiency, something typically absent in DIY builds. Nevertheless, a well-constructed microwave plasma cutter can still produce satisfactory results for lighter materials or less demanding applications, making it ideal for creative projects or limited fabrication tasks.
Cost vs. Performance
Another critical consideration is cost. Building a plasma cutter from a microwave can be a fraction of the price of a professional-grade machine. This aspect makes it appealing for DIY enthusiasts or students looking to gain hands-on experience without a substantial financial investment. However, the trade-off often comes in performance and durability. While the initial investment may be lower, the longevity and reliability of commercial plasma cutters are generally superior, often outweighing the upfront savings in the long run. Users should factor in their specific needs and how frequently they plan to use their cutter.
Safety and Ease of Use
Safety is paramount when comparing these tools. Commercial plasma cutters usually include comprehensive safety features, such as automatic shut-off systems and advanced cooling mechanisms, which are crucial for ensuring consistent performance and operator safety. On the other hand, a DIY plasma cutter constructed using household appliances may lack these essential protections. Thus, users must exercise greater caution and adhere to strict safety protocols when using homemade devices. It’s important to wear the appropriate personal protective equipment (PPE) and work in a well-ventilated area to mitigate any risks associated with plasma cutting.
In summary, both homemade and commercial plasma cutters have their place in the workshop. The decision between the two often boils down to factors such as budget, intended use, and the necessity for precision. While a microwave plasma cutter can serve well in a pinch, investing in a commercial unit is advisable for those requiring consistent, high-quality results for more demanding projects.
Creative Projects: What You Can Cut with Your Plasma Cutter
The versatility of a plasma cutter allows users to embark on a variety of creative projects, transforming sheets of metal into artistic expressions or practical tools. Whether you’re a hobbyist interested in crafting decorative pieces or a DIY enthusiast aiming to build functional items, understanding what you can cut with your microwave plasma cutter is essential. This tool is designed to snack away at materials with precision, offering opportunities limited only by your imagination.
One of the most exciting applications is creating intricate designs and art pieces. Using your plasma cutter, you can cut through thin sheets of mild steel or aluminum to craft decorative panels, garden sculptures, or wall art. The plasma cutter excels at producing curved cuts and fine details, allowing you to transform simple metal sheets into beautiful designs.
Additionally, DIYers can create custom metal parts for various projects. From brackets to supports, a plasma cutter can efficiently slice through thicker materials like stainless steel, enabling you to fabricate components that precisely match your specifications. This capability is particularly beneficial in automotive repair or fabrication, where custom parts often enhance vehicle performance or aesthetics.
When considering what to cut, materials play a crucial role. Here are some suggested materials and project ideas:
- Mild Steel: Ideal for sculptures, furniture parts, or custom brackets.
- Aluminum: Great for lightweight projects such as signage or decorative items.
- Stainless Steel: Perfect for kitchen utensils, outdoor decor, and durable art.
- Copper: Can be used for electrical projects and artistic items due to its warmth and color.
- Plastics (like acrylic): Great for light projects, including light fixtures and protective enclosures.
Always remember to adhere to safety precautions while operating your plasma cutter, especially when working with reflective materials like stainless steel or aluminum, which can create hazardous sparks and fumes. Proper ventilation and appropriate PPE, such as gloves and eye protection, will ensure a safe working environment.
Ultimately, the capabilities of a microwave plasma cutter can propel your creativity to new heights, enabling you to turn ideas into tangible, cut metal masterpieces. Whether cutting for utility or artistry, the projects you can pursue are as endless as your creative imagination.
Enhancing Performance: Modifications and Upgrades
To maximize the potential of your DIY microwave plasma cutter, various modifications and upgrades can enhance its performance significantly. One of the most effective upgrades involves improving the gas flow system. By integrating a higher-quality regulator and larger gas nozzle, you can achieve a more consistent and concentrated plasma arc. This enhancement allows for quicker cuts and reduces the risk of overheating the materials, leading to cleaner edges and greater precision.
Another valuable modification is the implementation of a more efficient cooling system. Many microwave plasma cutters operate with basic cooling mechanisms, which can lead to overheating during prolonged use. Adding additional cooling methods, such as a water-cooling system or external fan, can prolong the life of the equipment and maintain optimal performance even when tackling larger projects. This is particularly beneficial when cutting thicker materials, where extended periods of operation may generate substantial heat.
Additionally, the electrode used in the plasma cutter dramatically affects cutting quality. Upgrading to a more durable, high-quality electrode made of superior materials can enhance its lifespan while maintaining optimal conductivity. Ensuring that your plasma cutter’s consumables, including the electrode and nozzle, are of the highest standard can lead to a more stable arc and reduce maintenance needs over time.
Lastly, integrating a height adjustment feature to control the distance between the nozzle and the workpiece can drastically improve versatility. This adjustment can accommodate various material thicknesses, enabling you to refine the settings for different projects without compromising performance. Greater control over the height translates to more precise cuts and the ability to tackle a wide range of materials effectively.
With these modifications, your homemade plasma cutter can evolve into a robust and efficient tool that meets the demands of both intricate artistic projects and functional fabrications, ensuring a more enjoyable and productive experience.
Maintenance Tips for Longevity and Safety
To ensure the longevity and safety of a DIY plasma cutter, regular maintenance is crucial. Just like any other tool, neglecting maintenance can lead to diminished performance, unsafe operations, and ultimately, costly repairs. Cleaning the equipment after each use is a simple yet effective way to prolong its life. Accumulated debris and residue can obstruct the flow of gases and particulates, diminishing cutting quality. Utilize compressed air or a soft brush to clean the internal and external components, focusing particularly on the nozzle and electrode, where generalized wear and buildup can occur.
Another important aspect of maintenance involves regularly checking the consumables-nozzles, electrodes, and o-rings. These parts are subject to significant wear and can affect the quality of the plasma arc. Replace any worn or damaged components promptly to prevent further damage to the cutter and to maintain cutting precision. Keeping a well-stocked inventory of these essential parts can save time and ensure that you are always prepared for any necessary replacement.
Cooling System Maintenance
For plasma cutters that rely on cooling systems, such as water-cooling or fans, it’s essential to monitor and maintain these features. Ensure that water levels are appropriate and that any filters are clean to prevent blockages. If your setup includes fans, check regularly for dust accumulation and ensure unobstructed airflow. Overheating is markedly one of the most common causes of reduced efficiency and increased wear, making cooling system upkeep a critical maintenance task.
Lastly, ensure your workspace remains organized and free from clutter. Proper storage of the plasma cutter and its components not only protects it from physical damage but also helps maintain safety by reducing trip hazards or accidental contact with hot or sharp parts. By implementing these maintenance practices thoughtfully, you can enhance both the lifespan of your DIY microwave plasma cutter and the safety of your cutting operations, allowing for smoother and more efficient metal fabrication projects.
Expert Insights: Advice from Experienced Welders
Creating a plasma cutter from a microwave offers a thrilling yet challenging project that requires careful attention and insight from experienced welders. One of the most crucial pieces of advice is to understand the mechanics behind plasma cutting. This technology relies on ionizing gas to create a high-temperature plasma arc that melts metal as it moves along a workpiece. Familiarizing yourself with how this process operates will enhance your ability to troubleshoot and modify your device for optimal performance. Knowing that achieving a smooth, clean cut requires precise adjustments to gas flow and electrical output can save countless hours of trial and error.
To ensure safe operation, experts emphasize the importance of high-quality components. Utilizing a microwave transformer is standard, but knowing when and how to upgrade parts can significantly improve your machine’s cutting capabilities. Experienced welders recommend investing in durable nozzles and consumables, as these wear out quickly and affect overall performance. Make sure to choose materials compatible with the types of metals you plan to cut, as some combinations can lead to unsatisfactory results or even equipment damage.
When venturing into DIY plasma cutting, it’s also essential to pay heed to safety protocols. Strongly consider investing in personal protective equipment (PPE), including welding gloves, a face shield with appropriate lenses, and fire-resistant clothing. Many seasoned welders advise creating a dedicated, well-ventilated workspace away from flammable materials. Implementing these safety measures not only protects you from potential hazards but also promotes a more productive and focused environment.
Finally, continuous learning and adapting are key in this field. Joining forums or local welding clubs allows for the exchange of valuable tips and experiences. Sharing successes and challenges with others can lead to innovative solutions and techniques you may not have considered. Whether a beginner or an experienced welder, staying curious and engaged with the community will heighten your skills and propel your projects to new heights.
Exploring Alternative Methods for Plasma Cutting
In recent years, the demand for accessible and cost-effective cutting solutions has led to innovative alternatives to traditional plasma cutting methods. While DIY plasma cutters, such as those constructed from microwave parts, offer enthusiasts a chance to explore plasma technology, a variety of other techniques can also be leveraged for effective metal cutting. These alternatives each come with their own advantages and limitations, allowing users to choose the method that best aligns with their project needs and skill levels.
One noteworthy alternative is oxy-fuel cutting, which employs a combination of oxygen and fuel gases like acetylene to create a flame hot enough to melt metal. This method is particularly effective for cutting thicker materials and can be a suitable option where electrical components might present safety concerns. However, oxy-fuel cutting requires more skill to master than plasma cutting and necessitates careful management of gas supplies and flame properties to ensure clean cuts.
Another technique gaining traction is laser cutting, known for its precision and ability to produce intricate designs. While typically more expensive due to the need for specialized equipment, laser cutting offers unparalleled accuracy and a clean finish, making it ideal for detailed work such as metal art or automotive components. For those looking to experiment, low-power laser diodes can now be found that allow hobbyists to create makeshift laser cutters at home. However, safety precautions remain paramount, as the intensity of laser light can cause significant harm without appropriate protective measures.
For hobbyists wishing to cut thinner materials at home without immediate access to a plasma cutter or oxy-fuel equipment, abrasive wheel cutting presents a viable solution. Using tools such as angle grinders equipped with abrasive blades allows for effective cutting of various metals though with a greater risk of producing burring or needing secondary finishing processes. This method is widely accessible and requires minimal investment, making it a perfect entry point for beginners in metalworking.
Incorporating a diverse toolkit of cutting methods encourages skill development and problem-solving. Understanding the strengths and limitations of each alternative, whether for DIY plasma applications or traditional cutting methods, not only enhances creativity but ultimately leads to more successful and satisfying project outcomes.
Frequently Asked Questions
Q: Can I use any microwave for making a plasma cutter?
A: Not all microwaves are suitable for building a plasma cutter. Look for a microwave with a high wattage (ideally 1000 watts or higher) and an intact magnetron, as these components are crucial for generating the necessary plasma. Check the specifications before proceeding with your DIY project.
Q: What safety equipment do I need when making a plasma cutter from a microwave?
A: Essential safety equipment includes safety goggles, gloves, a respirator mask, and flame-resistant clothing. Ensure your workspace is well-ventilated, and always work in a controlled environment to minimize fire hazards when cutting metal.
Q: How do I safely dispose of a microwave after the plasma cutter conversion?
A: Dispose of a microwave by taking it to an electronic waste recycling facility. Never throw it in regular trash, as microwaves contain hazardous components. Ensure that the disposal complies with local regulations for electronic waste.
Q: Why would someone choose a homemade plasma cutter over a commercial one?
A: Homemade plasma cutters can be significantly cheaper than commercial ones and allow customization to meet specific needs. DIY projects also provide an educational experience in electronics and welding, enhancing personal skills and knowledge.
Q: What materials can I effectively cut with a microwave plasma cutter?
A: A microwave plasma cutter is effective for cutting materials such as thin steel, aluminum, and copper. It’s versatile for various DIY projects, including metal art and fabrication, but it may struggle with thicker materials.
Q: What modifications can enhance the performance of a homemade plasma cutter?
A: Upgrading components such as the gas flow system, nozzle design, and power supply can improve cutting efficiency. Additionally, using better quality electrodes will lead to cleaner cuts and longer operational life. Refer to your article’s section on enhancements for more specific tips.
Q: How can I troubleshoot common issues with a DIY plasma cutter?
A: Common troubleshooting steps include checking for gas leaks, ensuring proper electrical connections, and verifying that the plasma arc ignites correctly. Consult the troubleshooting section in your article for more detailed solutions to specific issues.
Q: What are the legal considerations when building and using a homemade plasma cutter?
A: Legal considerations include compliance with local electrical safety codes, ensuring that the design does not pose a fire hazard, and checking any regulations on homemade tools. It’s crucial to research your area’s laws regarding DIY equipment before you start.
In Summary
By transforming a microwave into a plasma cutter, you’ve unlocked a new realm of creative DIY projects that can elevate your welding pursuits. This unique approach not only showcases your ingenuity but also highlights cost-effective solutions to advanced manufacturing methods. Don’t let uncertainty hold you back-now is the perfect time to get started on your plasma cutting journey!
For more insights, check out our guides on safety protocols in home welding projects and in-depth reviews of MIG and TIG welding equipment. If you’re looking to further enhance your skills, subscribing to our newsletter will keep you updated with expert tips and additional resources. As you step into this exciting world, trust in your ability to innovate and share your experiences with our community. We’re here to support your journey!