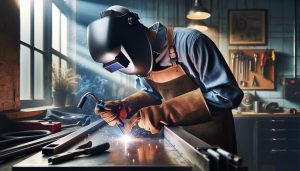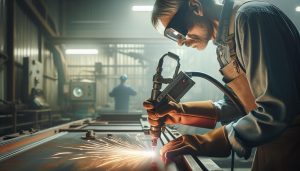
Creating your own plasma cutter can dramatically enhance your welding capabilities, making it an invaluable tool for metal fabrication projects. Plasma cutting not only provides precision and speed but also opens up a world of creative possibilities for both hobbyists and professional welders alike. However, the thought of building one might seem daunting. This DIY guide aims to demystify the process, empowering you with step-by-step instructions and crucial safety protocols to ensure a successful build. Whether you’re looking to save money, customize your equipment, or simply enjoy the satisfaction of creating something from scratch, you’ll find that assembling a plasma cutter is not only feasible but also rewarding. Dive into the detailed instructions and unlock the potential to take your metalworking skills to the next level.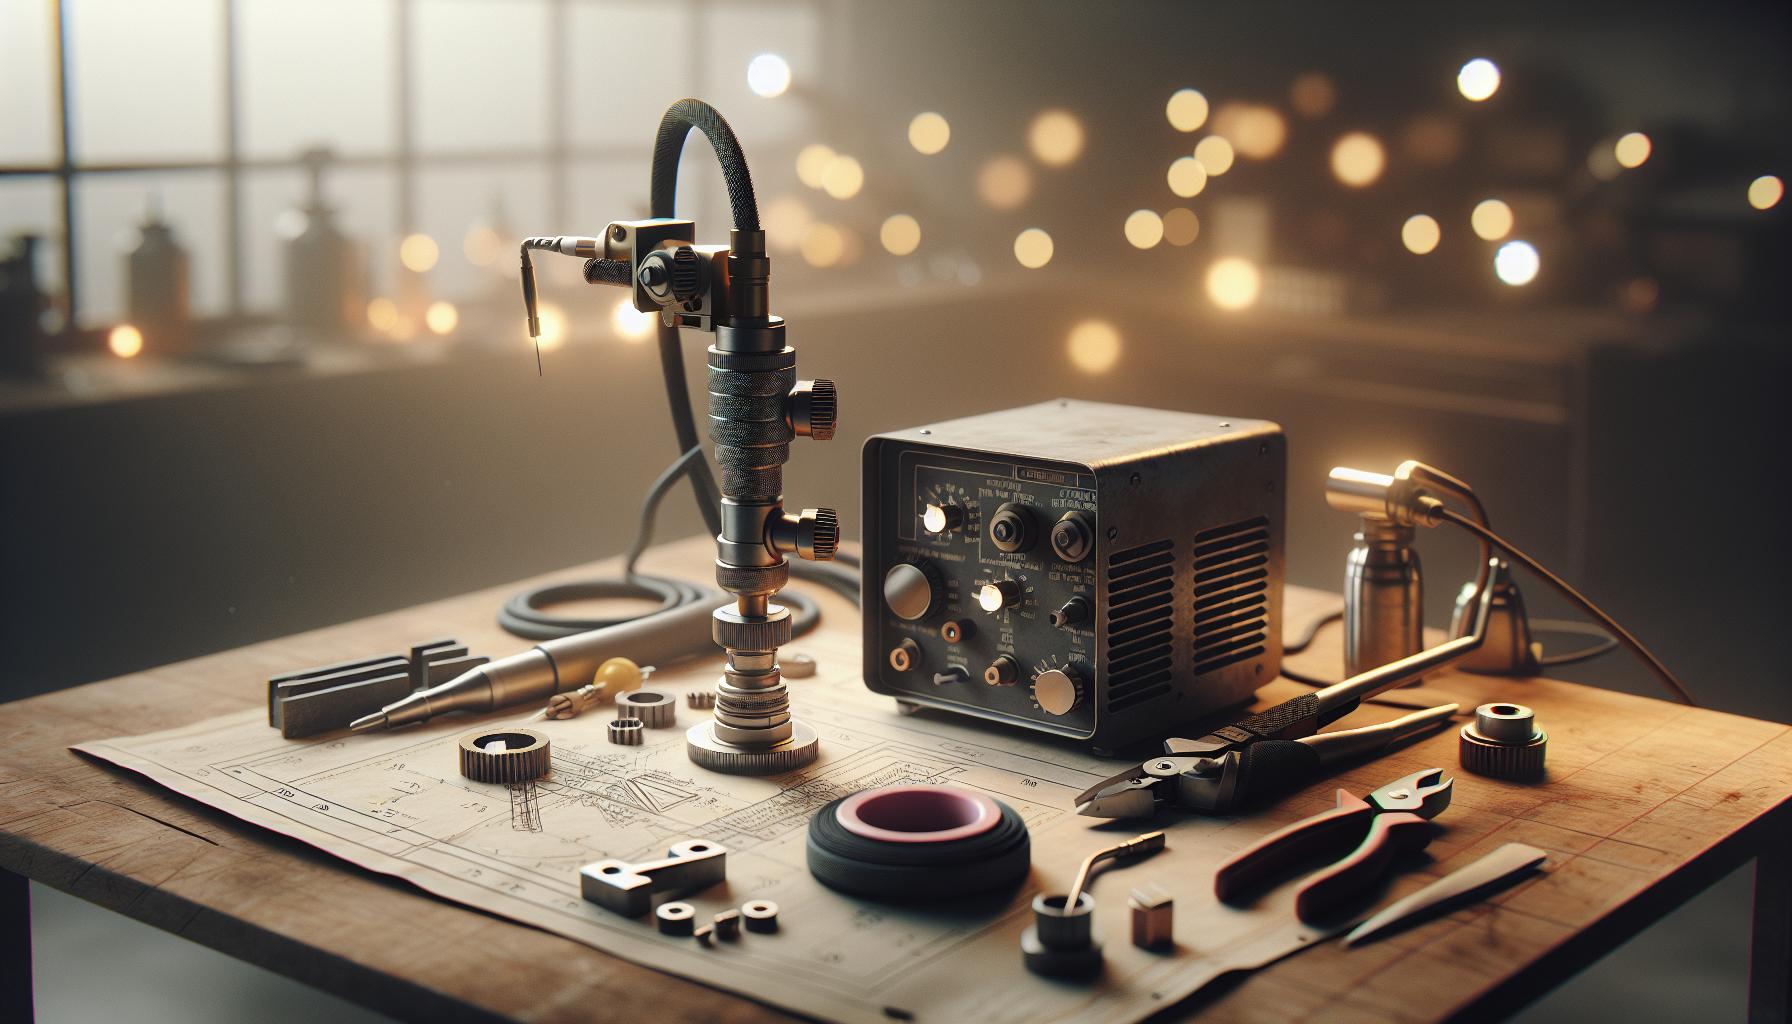
Essential Components of a Plasma Cutter
To successfully fabricate a plasma cutter, understanding its essential components is vital. A plasma cutter operates by creating an electric arc that ionizes compressed gas, producing plasma that can cut through conductive materials with precision. Below are the key components that make this process possible:
- Power Supply: This is the heart of your plasma cutter. It converts alternating current (AC) from a wall outlet into the high-frequency direct current (DC) required for creating the plasma arc. Depending on your design, you may need to select between a high-frequency or a contact start power supply.
- Cutting Torch: The torch is where the plasma is generated and directed. It typically consists of an electrode, nozzle, and the torch body. The electrode is responsible for producing the electric arc, and the nozzle shapes the plasma flow to achieve cutting efficiency.
- Gas Supply System: Compressed gas, commonly air or argon, is crucial for generating the plasma. A gas regulator is needed to control the flow and pressure of the gas, ensuring optimal cutting performance. An efficient cooling system may also be integrated into your gas supply to prevent overheating during operation.
- Ground Clamp: To complete the circuit, the ground clamp is attached to the workpiece. This is essential for the arc to function, as it provides a return path for the current.
- Protective Housing: Safety is paramount, especially when working with high voltages. A sturdy casing around electrical components protects users and prevents accidental contact.
Being well-acquainted with these components not only facilitates a smoother build process but also enhances safe operation during use. The effectiveness of your plasma cutter will largely depend on how well these elements are integrated and maintained. Thus, ensuring high-quality parts and careful assembly is vital for achieving optimal cutting precision and performance.
Understanding Plasma Cutting Principles
The process of plasma cutting harnesses the power of ionized gas, or plasma, to achieve precise and efficient cutting of conductive materials. The fundamental principle behind plasma cutting is straightforward: create an electric arc that ionizes pressurized gas, allowing for the rapid melting of metal. This method is considerably faster than traditional cutting techniques, making it ideal for both industrial and artistic applications.
At its core, plasma cutting involves a few key elements that work in tandem. The power supply generates the necessary high-voltage electricity, which flows into the cutting torch. Here, the conductive gas-usually compressed air, nitrogen, or argon-is introduced. As this gas becomes ionized from the electric arc, it converts into plasma, which reaches temperatures exceeding 20,000 degrees Celsius. The resulting plasma jet is directed toward the material to be cut. The high temperature and kinetic energy allow the plasma to cut through metal with remarkable speed and precision, leaving a clean edge with minimal thermal distortion.
In practical terms, understanding the dynamics of plasma cutting is essential for optimizing performance and safety. Factors such as the type of gas used, the amperage setting, and the distance from the workpiece can significantly affect the cutting quality. For instance, using an improper gas type can result in excessive dross, while an optimal amperage setting provides better penetration and cleaner cuts. Moreover, the configuration of the cutting torch, including electrode composition and nozzle size, also influences the focusing and efficiency of the plasma jet.
Understanding these principles and their practical implications not only enhances the user’s ability to cut various materials-such as steel and aluminum-but also helps in troubleshooting common issues related to inconsistent cuts or equipment failure. As you embark on building your DIY plasma cutter, recognizing these underlying principles will empower you to make informed decisions about materials and setup, ultimately leading to a more successful and safe cutting operation.
Key Materials Needed for DIY Plasma Cutter
Building a DIY plasma cutter can seem daunting, but with the right materials and components, it becomes a rewarding project. One of the most exciting aspects of working with plasma cutters is the versatility offered by the correct selection of materials, which can significantly impact the performance and efficiency of your machine. To achieve optimal cutting results, gathering quality components is essential.
The core materials required for constructing a plasma cutter include:
- Power Supply: A high-voltage DC power supply is crucial, as it generates the electric arc necessary for plasma formation. Look for a unit that can deliver sufficient amperage for your cutting needs.
- Cutting Torch: The torch is where the plasma is generated and directed. You’ll need a compatible torch that fits your chosen power supply and is designed for the gases you plan to use.
- Electrodes and Nozzles: These are critical for the ionization process. The electrode material typically includes copper or tungsten, and the nozzle helps focus the plasma jet. Ensure you select the size that matches your application for effective cutting.
- Gas Supply: Compressed air is commonly used, but gases like nitrogen or argon can provide benefits for specific applications. A reliable gas setup will ensure consistent plasma quality.
- Cooling System: Plasma cutting generates significant heat. Using a cooling system, whether air or water-cooled, helps maintain optimal torch temperatures and prolongs the life of your components.
- Frame and Housing: A sturdy frame to hold all your components is necessary. Consider using metal for durability and stability, ensuring that it is well-ventilated to allow heat dissipation.
- Safety Gear: Essential for any welding-related project, invest in high-quality gloves, a welding mask, and appropriate protective clothing to safeguard against sparks and harmful UV light.
By selecting high-quality and compatible materials, you set the foundation for an efficient and effective DIY plasma cutter. This careful planning not only enhances performance but also promotes safety, crucial aspects in any metalworking project. Understanding the function of each component will enable you to troubleshoot and refine your cutter for various applications-from intricate designs to heavy-duty cutting tasks. With the right materials in hand, you’re well on your way to crafting a reliable tool that can unlock new creative possibilities in your metalworking endeavors.
Step-by-Step Guide to Building Your Plasma Cutter
Building your own plasma cutter can be an exciting and educational endeavor, equipping you with the skills to perform high-precision metal cutting in various projects. To embark on this journey effectively, following a structured approach is essential. Each step plays a vital role in ensuring that your machine operates safely and efficiently.
Start by gathering all the essential components outlined previously. As you accumulate parts like the power supply, cutting torch, electrodes, and gas system, take the time to familiarize yourself with each component’s specifications. Create a clean workspace where you can safely assemble your cutter, keeping all tools and materials organized. This not only simplifies the build process but significantly enhances safety.
Step 1: Assemble the Frame
Construct a sturdy frame using steel or aluminum to support the weight of your components. Ensure the design allows for sufficient ventilation to manage heat dissipation. Use metal brackets and screws to secure the frame. This frame will house the power supply, cooling systems, and torch, so stability is key.
Step 2: Install the Power Supply
Carefully mount the high-voltage DC power supply to the frame, ensuring it is secure and positioned to allow easy access to the controls. Follow the manufacturer’s guidelines to connect it properly, paying attention to grounding procedures to minimize electrical hazards. All wiring should be neatly organized to avoid tangling or accidental disconnections during operation.
Step 3: Set Up the Cutting Torch
Attach the cutting torch to the frame, aligning it with the electrical and gas supply ports. Ensure the connection is airtight to prevent gas leaks. Secure the nozzle and electrode, according to specifications, making sure they are appropriate for your cutting needs. Test the fittings meticulously before moving on to connecting the gas supply.
Step 4: Connect the Gas Supply
Procure a safe and reliable gas setup. Compressed air is commonly used; however, if you opt for gases like nitrogen or argon, ensure all connections are tight and appropriately rated for the pressure used. Run the gas line through your frame. Conduct a leak test by applying a soapy solution to joints-bubbles will indicate leaks.
Step 5: Install the Cooling System
Integrate a cooling system within the frame. If using air cooling, ensure your setup allows for unrestricted airflow. For water-cooled systems, make sure the water reservoir is filled, and the pump is operational. Maintaining an optimal temperature is vital for prolonging the life of electrodes and nozzles.
Step 6: Final Assembly and Testing
Once all components are installed, perform a thorough check of all connections and fasteners. Make sure to organize any loose wires, securing them neatly away from areas at risk for movement or heat. Plug in the system and perform a controlled test run, initially with the gas off to check for electrical flow and arcing actions before introducing gas into the mix.
Safety is paramount throughout this process. Always wear appropriate safety gear, including gloves and a mask, during assembly and testing. Validate your setup by observing all safety protocols, making your first cutting tests on scrap metal to ensure the machine operates as intended. This careful attention to detail will set you on the path toward a successful DIY plasma cutter that will serve you well in your metalworking projects.
Wiring and Electrical Setup for Safety
The wiring and electrical setup of your DIY plasma cutter is a critical stage that demands meticulous attention to detail. A well-organized electrical system not only optimizes performance but is also essential for user safety. Proper grounding and adherence to electrical codes will help prevent accidental shocks and device malfunctions. Essentially, this step is about converting electrical energy into a controlled plasma arc that can efficiently cut through materials.
To begin with, ensure that the power supply you choose is compatible with your plasma cutter design. You should employ a high-voltage DC supply, typically between 30 to 100 amps, depending on the desired cutting thickness and speed. Follow the manufacturer’s guidelines for wiring connections, emphasizing the secure attachment of positive and negative terminals. Use suitably rated wires that handle the expected current load and minimize the risk of overheating. It’s advisable to use a dedicated circuit with fuse protection to shield the entire setup from power surges.
Key Safety Measures:
- Always work in a dry environment to minimize the risk of electrical shocks.
- Utilize insulated tools to prevent accidental contacts with live wires.
- Verify all connections twice before applying power; loose connections can create arcing which is dangerous.
- Incorporate a kill switch within easy reach so you can quickly deactivate the power in an emergency.
When wiring the cutting torch, it’s crucial to connect the electrode and nozzle properly, ensuring they are firmly attached to prevent arcing and potential damage. Test the setup thoroughly before the first use to check for any issues. This includes turning on the machine with a test load to ensure everything functions as intended, without any excessive resistance in the connections that could lead to overheating. By following these guidelines, you ensure that your plasma cutter not only delivers high performance but also operates safely, providing peace of mind during usage.
Choosing the Right Power Source
Selecting the appropriate power source is fundamental to the efficacy and safety of your DIY plasma cutter. A well-chosen power supply ensures that the machine operates efficiently and delivers the cut quality you require. Typically, plasma cutters demand a high-voltage direct current (DC) supply, with most models operating between 30 to 100 amps. The right amperage will largely depend on the thickness of the material you plan to cut; thicker materials require higher currents to achieve a clean and precise cut.
When deciding on a power source, consider whether to go with an AC-DC multi-purpose welder or a dedicated plasma cutter. An AC-DC welder provides versatility, allowing you to perform various welding tasks beyond cutting, but it’s essential that it offers sufficient amperage for plasma cutting. For those focused specifically on plasma cutting, a dedicated power supply unit (PSU) might be more efficient and user-friendly. Look for a unit with an adjustable output, allowing you to match the amperage precisely to your material thickness and cutting speed.
Power Source Characteristics
It’s critical to pay attention to several characteristics when choosing a power source:
- Voltage Rating: Confirm that the voltage rating matches the requirements of your plasma cutter, typically 110V or 220V for home use.
- Duty Cycle: Ensure the power source can sustain a high duty cycle, as continuous cutting may lead to overheating in underperforming units.
- Portability: If mobility is a concern, consider a portable power source with a compact design without compromising on power.
Many DIY welders and fabricators often overlook the importance of a reliable power supply. Using inadequate or unstable sources can lead to inconsistent cuts, thermal overload, and even damage to the plasma cutter. To mitigate these risks, always conduct a thorough assessment of your electrical system before making a decision. If you’re utilizing a home outlet, ensure that it can handle the amperage draw; circuit breakers should match or exceed the requirements of your chosen power source.
Investing time in selecting the right power supply will pay off immensely in both the performance of your plasma cutter and the quality of your cutting tasks, whether you are working with steel, aluminum, or other materials.
Testing and Calibration Techniques
Testing and calibration are essential steps in ensuring that your DIY plasma cutter operates efficiently and produces high-quality cuts. An effective way to start is by checking the gas pressure and airflow. Most plasma cutters require a specific gas flow rate to create a stable arc. Use a flow meter to confirm that the pressure matches the manufacturer’s specifications; typically, this could range from 45 to 70 psi for air pressure.
Once the gas pressure is set, it’s crucial to calibrate the cutting current and voltage. Different materials and thicknesses will require adjustments. To do this, begin by setting the cutter to a mid-range value based on the thickness of the metal you’ll be cutting. For instance, if you’re cutting steel that’s 1/4 inch thick, start at around 40 amps, then conduct a few test cuts, observing the quality of the cut edges. A clean cut with minimal dross indicates that the settings are correct, while excessive melting or burn-through suggests that adjustments are necessary.
Performing Test Cuts
Conducting test cuts on scrap metal provides practical feedback on your calibration. Here are some tips for effective testing:
- Monitor the cut quality: Ideal cuts should have a smooth edge without significant roughness.
- Adjust settings: Make small incremental adjustments to account for material type and thickness.
- Document your settings: Keeping a record of settings for different materials can streamline future projects.
Additionally, consider using a test piece that resembles the material you plan to work on regularly. This ensures that your plasma cutter’s performance is tailored for the specific cuts you will be making in your typical projects. After a few rounds of testing and adjusting, you should arrive at a set of optimal settings that ensure consistent results.
Regular calibration is not just for initial testing; it’s a routine that should be followed, especially after extensive use or when changing materials. Conducting a comprehensive calibration every few months will help maintain your plasma cutter’s precision, prolong its lifespan, and ensure safety during operation.
Safety Precautions for Plasma Cutting
When engaging in plasma cutting, prioritizing safety is paramount due to the inherent risks associated with high temperatures, intense light, and flying debris. Plasma cutting operates by generating extreme heat to melt and vaporize metal, creating intense arcs that can cause severe burns or injuries if proper precautions are neglected. Taking the right safety measures can ensure a safer working environment and promote overall efficiency during your cutting projects.
Before starting any plasma cutting operation, ensure you are equipped with the appropriate personal protective equipment (PPE). This includes flame-resistant clothing, leather gloves, safety goggles or a welding helmet that shield against ultraviolet (UV) and infrared (IR) radiation. It’s critical to have a well-ventilated workspace to prevent inhalation of harmful fumes generated during cutting, especially when working with coated or painted metals. Use a respiratory mask if cutting in confined or poorly ventilated areas.
Additionally, create a safe workspace by removing flammable materials and ensuring adequate distance from combustible items. Keep a fire extinguisher nearby and familiarize yourself with its operation. Maintain clear access to exits and ensure that all electrical connections are secure to prevent shock hazards. Regularly inspect your equipment for wear or damage, as frayed cables or malfunctioning parts can lead to accidents.
Proper techniques while operating the plasma cutter also enhance safety. Maintain a stable footing and a firm grip on the tool to avoid losing control while cutting. Always follow the manufacturer’s guidelines for settings and procedures specific to your model, and never attempt to modify or repair the cutter while it is powered on. Be mindful of your surroundings, ensuring that onlookers keep a safe distance to avoid injury from sparks or hot metal pieces.
Incorporating these safety practices is essential for any plasma cutting project, whether you’re a beginner or experienced welder. Establishing a strong safety foundation not only protects you but also enhances the overall quality and precision of your work.
Common Troubleshooting Tips for DIY Plasma Cutters
Common troubleshooting scenarios for DIY plasma cutters can mean the difference between a successful project and a frustrating one. Whether it’s inconsistent cuts, equipment malfunctions, or improper settings, identifying and rectifying these issues quickly can save both time and material costs. Here are some practical tips to help you troubleshoot effectively.
One of the most common issues is the quality of the cut itself. If you’re experiencing rough or uneven edges, check the following:
- Integrity of the consumables: Inspect the nozzle and electrode for wear or damage, as dull or worn components can heavily affect cutting accuracy.
- Air Pressure: Ensure that the air pressure is set according to the manufacturer’s specifications. Low air pressure can lead to poor quality cuts, while too high pressure can cause excessive dross.
- Speed and Angle: Experiment with your travel speed and cutting angle. A too-fast feed can create weak cuts, while a too-slow speed may lead to excessive melting.
Another critical aspect of troubleshooting is addressing electrical issues. If your plasma cutter isn’t turning on or you notice flickering lights, perform the following checks:
- Power Source: Verify that your power supply is functioning. Test it with a multimeter to make sure it delivers the proper voltage.
- Connections: Examine all electrical connections for looseness or corrosion. Properly secured connections can often resolve many unexpected shutdowns.
- Circuit Breaker: Ensure that the circuit breaker hasn’t tripped. If it has, investigate for underlying issues, as frequent tripping may indicate a deeper problem.
Lastly, keep an ear out for unusual sounds during operation. Popping, hissing, or crackling can indicate potential mechanical issues. These sounds may point to issues such as:
- Cooling System Malfunction: If your plasma cutter is overheating, check for blockages in the cooling system or low coolant levels.
- Fuel Gas Problems: In dual-gas systems, improper gas mixtures can yield inconsistent cutting effectiveness, so double-check your gas configurations.
- Grounding Issues: Ensure that the workpiece is adequately grounded, as poor grounding can lead to erratic behavior and inconsistent arcs.
By methodically addressing these common problems, you can enhance your DIY plasma cutter’s reliability and ensure a smoother experience overall. Remember, regular maintenance and inspection of both consumables and electrical components will minimize issues and maximize performance.
Upgrades to Enhance Plasma Cutter Performance
To truly elevate the performance of your DIY plasma cutter, consider a few strategic upgrades that can enhance cutting speed, accuracy, and overall reliability. One of the most effective improvements is the incorporation of a high-quality torch assembly. Investing in a better nozzle and electrode can lead to cleaner cuts and a longer operating life for these consumables, minimizing downtime and replacement costs. Opting for nozzles with advanced designs, such as those that promote better gas flow, can directly improve cutting quality and precision.
Another critical upgrade is the inclusion of a more robust cooling system. Plasma cutting generates significant heat, which can quickly lead to overheating and operational inefficiencies. By enhancing the cooling mechanism-whether through improved fan systems or liquid cooling-users can ensure consistent performance during extended uses. This not only preserves the integrity of the components but also extends their lifespan, making your plasma cutter a more reliable tool in your workshop.
Furthermore, consider upgrading the power supply of your plasma cutter. A more powerful and stable power source (preferably inverter-based) can provide you with better arc stability and performance at higher cutting speeds. Different materials and thicknesses require varying levels of power; a versatile power supply allows you to adjust settings quickly, ensuring optimal performance regardless of the job specifics.
Lastly, incorporating a height control module can significantly enhance cut quality. Automatic height adjustment keeps the torch at the ideal distance from the workpiece, compensating for any surface irregularities. This upgrade not only improves the quality of the cuts but also reduces wear on consumables, ultimately saving costs in the long run. Together, these upgrades transform a basic DIY plasma cutter into a powerhouse tool capable of tackling a wide range of projects with professional-grade results.
Comparing DIY vs. Commercial Plasma Cutters
When considering plasma cutters, a significant decision lies in choosing between DIY models and their commercial counterparts. Each option presents unique advantages and trade-offs, making it essential to understand how they align with your specific needs, especially for projects that may involve different materials like steel or aluminum.
DIY plasma cutters offer a hands-on approach that allows for greater customization. You can select components to suit your budget and performance requirements, from the power source to the torch type. Building your own plasma cutter often results in significant cost savings compared to commercial units, which can be prohibitively expensive. Moreover, assembling a DIY cutter can provide valuable learning experiences about the technology involved, making it an excellent choice for hobbyists or those on a tight budget who enjoy taking an active role in their equipment’s development.
On the other hand, commercial plasma cutters generally boast higher reliability and better performance out of the box. These machines are typically designed with advanced features, such as built-in arc stability controls and better cooling systems, which can enhance cutting precision and material versatility. For projects requiring consistent results across various applications, a commercial plasma cutter may be the preferable option, as they often come with warranties and customer support, a significant advantage if operational issues arise.
Key Differentiators
When comparing DIY to commercial plasma cutters, consider the following factors:
- Cost: DIY models are generally more cost-effective, while commercial options come with a premium reflecting their reliability and advanced features.
- Performance: Commercial cutters often deliver superior performance, especially for industrial applications, whereas DIY models may require tweaks for optimal results.
- Customization: DIY cutters allow for extensive customization, catering to the specific needs of the builder, while commercial models offer predetermined configurations.
- Support and Warranty: Commercial options provide warranties and support, giving users peace of mind about repairs and maintenance.
Ultimately, the choice between a DIY and a commercial plasma cutter depends on your specific project requirements, budget constraints, and willingness to invest time into building and troubleshooting a custom unit. By carefully weighing these factors, you can make an informed decision that best meets your plasma cutting needs.
Practical Applications of Your Homemade Plasma Cutter
The versatility of a homemade plasma cutter opens up a world of possibilities for various projects, making it an invaluable tool for hobbyists and professionals alike. Whether you’re working in a garage, workshop, or outdoor environment, your DIY plasma cutter can tackle an impressive range of applications, from delicate artistic creations to robust industrial tasks. One of the most common uses is metal fabrication, where precision cutting is essential. With the ability to cut through materials like steel, aluminum, and copper with ease, a well-calibrated plasma cutter allows you to create intricate shapes and designs that would be difficult with traditional methods.
Another practical application lies in automotive repair and modification. Enthusiasts often find themselves needing to cut or reshape metal body parts, exhaust systems, or custom brackets. With a homemade plasma cutter, these modifications can be done efficiently, allowing for tailored modifications that meet unique specifications. Additionally, metal artists can utilize plasma cutting for sculpture creation and metal art projects, where the ability to produce fine details and complex patterns enhances the artistic process.
In the realm of DIY home projects, your plasma cutter can be an excellent companion for creating metal furniture, decorative elements, or even custom fencing. This custom fabrication can add a personal touch to your home and garden, showcasing your craftsmanship while incorporating functional design elements. Furthermore, for those involved in construction or renovation, a plasma cutter can be indispensable for cutting rebar, metal studs, or decorative metalwork, significantly speeding up processes that would otherwise be labor-intensive.
Ultimately, the applications of your homemade plasma cutter are limited only by your imagination and the materials at your disposal. As you gain experience, you can experiment with various techniques, such as beveling or piercing, to expand the functionality of your tool. Prioritizing safety and proper technique ensures that your projects turn out well and that you work efficiently without risk of injury. So whether you’re a novice or an experienced fabricator, embracing the capabilities of a plasma cutter can elevate your metalworking projects to new heights.
Frequently asked questions
Q: What components do I need to build a DIY plasma cutter?
A: To build a DIY plasma cutter, you’ll need essential components like a plasma torch, air compressor, power source (typically a transformer or inverter), and various consumables like electrode and nozzle. Refer to the “Essential Components of a Plasma Cutter” section for more detailed information.
Q: How do I calibrate my homemade plasma cutter?
A: Calibration of a homemade plasma cutter involves adjusting the electrical settings and air pressure for optimal cutting performance. Follow the “Testing and Calibration Techniques” section in your guide for step-by-step calibration instructions to ensure effective operation.
Q: What safety precautions should I take when using a DIY plasma cutter?
A: Safety precautions include wearing proper protective gear, ensuring adequate ventilation, and maintaining a safe distance from flammable materials. Always refer to the “Safety Precautions for Plasma Cutting” section for comprehensive guidelines to minimize risks.
Q: How can I troubleshoot a plasma cutter that won’t start?
A: Common troubleshooting steps for a non-starting plasma cutter include checking the power connections, ensuring the air supply is functioning, and inspecting the electrical components for defects. The “Common Troubleshooting Tips for DIY Plasma Cutters” section provides detailed troubleshooting techniques.
Q: What is the best power source for a DIY plasma cutter?
A: The best power source for a DIY plasma cutter typically includes either an AC transformer for basic models or a DC inverter for more advanced features. It’s crucial to assess your cutting needs; see the “Choosing the Right Power Source” section for more insights.
Q: Can I modify my plasma cutter for better performance?
A: Yes, you can modify your plasma cutter by upgrading components like the torch or air supply system to enhance cutting speed and quality. Details on practical upgrades can be found in the “Upgrades to Enhance Plasma Cutter Performance” section of your guide.
Q: What materials can I cut with a DIY plasma cutter?
A: A DIY plasma cutter can effectively cut various metals, including steel, aluminum, and copper. For a comprehensive understanding of practical applications, refer to the “Practical Applications of Your Homemade Plasma Cutter” section.
Q: Are there significant differences between DIY and commercial plasma cutters?
A: Yes, DIY plasma cutters often have customizable features and lower costs, while commercial models offer higher reliability, consistency, and advanced settings. For a detailed comparison, check the “Comparing DIY vs. Commercial Plasma Cutters” section in your guide.
Concluding Remarks
Now that you have the complete guide on how to make your own plasma cutter, it’s time to turn your plans into action. This DIY project not only enhances your welding capabilities but also empowers you to tackle a variety of metalworking tasks more efficiently. As you embark on this journey, explore related techniques for MIG, TIG, and stick welding to broaden your skills further. Don’t forget to check out our equipment reviews to ensure you have the best tools at your fingertips.
If you have any questions or need guidance, feel free to join the conversation in the comments below! Your experience and insights are invaluable to our community. For even more hands-on resources, consider signing up for our newsletter to stay updated with the latest welding tips and tricks. Equip yourself for success, and let’s forge ahead with your plasma cutter project today! Your next welding masterpiece awaits!