Welding aluminum with a MIG welder can unlock the potential for crafting everything from custom vehicles to artistic structures. Did you know that aluminum is one of the most commonly welded metals, prized for its lightweight and corrosion resistance? However, many welders face challenges when working with this material due to its unique properties and the need for specific techniques. In this step-by-step guide, you will discover not only the essential equipment and settings needed but also practical tips to overcome common obstacles. Whether you’re a novice eager to learn or an experienced welder looking to refine your skills, mastering MIG welding for aluminum will enhance your capabilities and expand your project possibilities. Dive in to gain the knowledge you need for successful aluminum welding, ensuring that every project is a testament to your craftsmanship and safety.
Understanding the Basics of Aluminum Welding with MIG
Welding aluminum with a MIG welder presents unique challenges and advantages that set it apart from welding other metals like steel. One of the most compelling aspects of aluminum welding is the metal’s high thermal conductivity, which means it dissipates heat rapidly. This property necessitates a precise approach to avoid warping or burn-through during the welding process. Understanding this fundamental characteristic prepares welders to adapt their techniques effectively to accommodate aluminum’s specific behavior when exposed to high temperatures.
To begin, it’s crucial to recognize that aluminum typically requires a direct current (DC) electrode positive configuration when using a MIG welder. This setting ensures a stable arc and penetrative heat, crucial for achieving strong welds. Moreover, using a suitable filler wire-commonly ER4047 or ER5356-can dramatically enhance the quality of the weld. Both materials offer distinct properties; for example, ER4047 provides a softer weld, ideal for applications requiring malleability, while ER5356 yields a stronger, harder finish suitable for structural components.
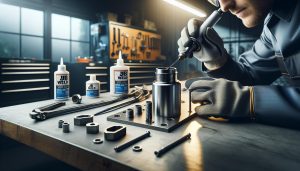
When starting the welding process, clean surfaces are essential. Any contaminants, such as oil, grease, or aluminum oxide, can compromise the integrity of the weld. A thorough cleaning with a suitable solvent followed by a mechanical method-such as sanding or wire brushing-ensures that the aluminum is ready for optimal adhesion. Furthermore, maintaining a consistent travel speed and distance from the workpiece can help control the heat input, leading to better penetration and a smoother finish.
In essence, successful aluminum MIG welding hinges on a welder’s understanding of the material’s physical properties, the settings and equipment used, and the preparation and technique involved. By mastering these elements, welders can ensure strong, aesthetically pleasing joints that stand the test of time, making aluminum welding a rewarding skill in the fabrication world.
Essential Equipment for MIG Welding Aluminum
To achieve optimal results in MIG welding aluminum, having the right equipment is critical. Aluminum’s unique properties, such as its lower melting point and higher thermal conductivity compared to steel, necessitate specific tools and accessories tailored for effective welding. By investing in quality equipment and understanding their functions, welders can navigate the challenges associated with aluminum fabrication more effectively.
One of the most important components is a MIG welder capable of DC electrode positive (DCEP) settings. This configuration provides the necessary heat input for penetrating aluminum effectively. Additionally, ensure that the welder includes a spool gun or a push-pull system. These setups are particularly beneficial for welding aluminum wire, as they minimize feeding issues associated with its softer nature.
In conjunction with the welder, the choice of filler wire is also significant. Common options include ER4047 and ER5356; both should be selected based on the specific application requirements. For clean and efficient operation, a cleaning brush and a degreaser are essential for preparing aluminum surfaces, as any contamination can lead to weak welds.
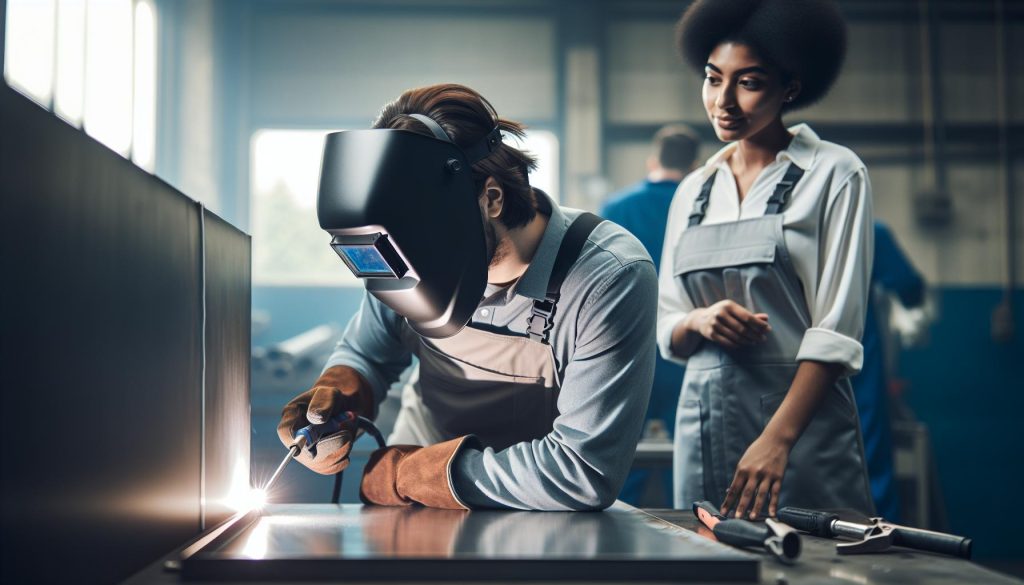
Lastly, proper protective gear should not be overlooked. This includes welding gloves, a welding helmet with an appropriate shade for aluminum, and protective clothing made from fire-resistant materials. Collectively, these components enhance the quality of the weld and increase the welder’s safety, paving the way for successful aluminum MIG welding.
Preparing Aluminum Materials for a Successful Weld
To achieve successful welds with aluminum, meticulous preparation of the material is crucial. Aluminum’s natural oxide layer, which forms quickly upon exposure to air, can weaken the integrity of a weld if not properly addressed. Thus, cleaning the aluminum surface is the first step that unmistakably sets the foundation for a solid bond. A simple yet effective cleaning routine can involve using a degreaser to remove oil, grease, and other contaminants, followed by a wire brush specifically designed for aluminum to eliminate the oxide layer. It’s essential to use tools that will not scratch the surface too deeply, as any major imperfections can cause issues during the welding process.
Surface Preparation Steps
- Degreasing: Apply a suitable solvent or degreaser to the aluminum surface. Wipe it down with a clean rag to remove all oils and contaminants.
- Mechanical Cleaning: Utilize a stainless steel wire brush or a dedicated aluminum cleaning tool to remove the oxide layer. Make sure to brush in one direction to prevent re-contaminating the surface.
- Final Rinse: For added assurance, rinse the surface with water or a solvent before welding and allow it to dry completely.
Beyond cleaning, it’s vital to consider how the aluminum parts will be secured during welding. Proper clamping techniques or fixtures can prevent shifting and warping as the metal heats up and cools down. For instance, using non-conductive clamps will not only keep your work in place but will also avoid introducing additional electrical currents in the weld area that could cause defects.
Lastly, understanding the specific type of aluminum and its intended application will inform the preparation process. Different alloys may react differently under heat during the welding process, so consulting a material data sheet before beginning is advisable. By taking the time to thoroughly prepare aluminum materials, welders can significantly enhance the likelihood of achieving quality, durable joints that will meet their specifications and performance requirements.
Setting Up Your MIG Welder for Aluminum
involves a series of meticulous adjustments to ensure optimal performance and quality welds. Unlike steel, aluminum has unique characteristics that require specific gear settings and techniques. One of the first steps is to choose the appropriate welding wire-typically ER4047 or ER5356 aluminum welding wire, which provides the necessary ductility and strength. These wires are often available in spool sizes that accommodate various welder models, so ensure compatibility with your machine.
Next, adjust the welder settings to cater to aluminum’s lower melting point and high thermal conductivity. The wire feed speed (WFS) should be higher to facilitate a smoother arc; a good starting point is around 200-450 inches per minute, but this may vary depending on the thickness of the aluminum. The voltage setting should also align with the wire diameter; for instance, a 0.035-inch wire may require a voltage ranging from 16 to 22 volts. Given aluminum’s susceptibility to distortion due to heat, consider a shorter stick-out (the distance from the contact tip to the workpiece), ideally around 1/4 to 3/8 inch, to maintain better control and minimize heat input.
Don’t overlook the importance of using a spool gun if your MIG setup does not have a direct feed mechanism. A spool gun is specifically designed to handle soft aluminum wire without causing tangles or feed issues, greatly enhancing the welding experience. Properly securing the aluminum workpieces with clamping tools can also prevent movement and warping during the welding process. Additionally, check your gas setup; using 100% argon as a shielding gas is preferable for aluminum to prevent oxidation, ensuring a clean and strong weld without contamination.
Finally, always maintain a hygienic workspace and care for your equipment. Regularly inspect your MIG gun, nozzle, and contact tips for wear and tear, and clean them to avoid buildup that could impair performance. By following these preparatory steps and adjusting your setup accordingly, you’ll be better equipped to tackle aluminum MIG welding projects with confidence and precision.
Mastering Welding Techniques for Aluminum
Welding aluminum with a MIG welder is both an art and a science, requiring mastery of specific techniques to achieve optimal results. One of the first considerations is the travel speed; moving too fast can result in weak welds, while moving too slowly risks warping the aluminum due to excessive heat. A steady, moderate pace allows for adequate penetration and bead formation. Focus on maintaining a consistent angle-typically around 10 to 15 degrees-from vertical, which helps direct the molten puddle effectively and maintain a controlled arc.
Establishing the correct arc length is crucial. An overly long arc can lead to a sputtering weld, while a too-short arc may result in excess spatter. Strive for a tight arc where the wire tip almost touches the base material. Regular practice is essential for developing a feel for these adjustments, especially in gauging the right distance for the contact tip from the aluminum surface. Utilizing a weaving technique-moving the welder back and forth in a controlled manner-can enhance the strength of the joint while ensuring coverage of the base material, which is particularly beneficial for thicker aluminum sections.
The choice of filler material also influences your technique. For example, when using ER4047, which contains a higher silicon content, you may observe fluidity in the weld puddle that can lead to a smoother finish. However, using ER5356 may require more attention to control due to its higher strength and reduced fluidity.
Practice is essential in mastering these techniques, so don’t hesitate to run a few test beads on scrap aluminum to calibrate your settings and become comfortable with the welder’s responsiveness. This preparation pays off, resulting in better control during actual welds, reduced chances of defects, and ultimately, a higher quality final product.
Common Challenges When MIG Welding Aluminum
Welding aluminum with a MIG welder presents a unique set of challenges that can test even the most skilled welders. One prominent issue is the material’s tendency to warp due to its high conductivity and thermal expansion. Aluminum dissipates heat quickly, which can lead to uneven melting and distortion if not controlled properly. To mitigate this problem, it’s essential to manage your travel speed and heat input, ensuring that you maintain a steady pace and adjust your settings for the specific thickness and type of aluminum you are working with.
Another common challenge is the formation of a porous weld. Aluminum’s natural oxide layer can lead to contamination in the weld pool if not adequately addressed. Pre-cleaning the base material with a suitable solvent, such as acetone, and using a wire brush to remove any oxidation before welding is crucial to achieving a clean joint. Additionally, ensuring that your shielding gas is appropriate-typically pure argon or a mix of argon with helium-can help reduce the risk of contamination and improve your overall weld quality.
Equipment limitations can also present challenges. Not all MIG welders are equipped to handle aluminum effectively, and choosing the right diameter of filler wire and correct nozzle size are vital for smooth operation. Using a larger contact tip can help accommodate the higher heat transfer, and experimenting with different wire feed speeds during practice runs can give you a better feel for maintaining the right arc length and consistency.
Lastly, the need for precise control during welding cannot be overstated. Beginner welders, in particular, may struggle with managing the weld puddle and maintaining the correct arc length. To develop a steady hand, consider practicing on scrap aluminum to test various settings and techniques. The more familiar you become with the behavior of aluminum under heat, the more successful your welds will be, leading to stronger and more aesthetically pleasing results.
In summary, addressing the challenges of MIG welding aluminum involves controlling heat input, ensuring cleanliness, using appropriate equipment, and developing refined techniques through practice.
Safety Protocols for Aluminum MIG Welding
Welding aluminum with a MIG welder presents unique safety challenges that necessitate a comprehensive understanding of proper protocols. Given aluminum’s low melting point and high reflectivity, maintaining a safe working environment is crucial to avoid accidents and injuries. Not only does aluminum require specific considerations, but the equipment itself, when mishandled, can pose risks such as electric shocks, burns, and exposure to hazardous fumes.
Essential Safety Gear
Before starting any MIG welding project, it is imperative to don appropriate personal protective equipment (PPE). This includes:
- Welding Helmet: A helmet with a suitable shade lens to protect your eyes and face from ultraviolet and infrared radiation.
- Respiratory Protection: Use a respirator or a fume extraction system to minimize inhalation of harmful fumes that may be released during the welding process.
- Protective Clothing: Wear fire-resistant clothing, including gloves, aprons, and jackets designed specifically for welding to protect against sparks and heat.
- Foot Protection: Steel-toed boots are essential to protect your feet from heavy equipment and ensure safety in the workspace.
Workspace Safety
Creating a safe welding area is equally important. Ensure that the welding environment is well-ventilated to disperse any harmful fumes or gases produced during the welding process. Flammable materials should be removed from the vicinity, and a fire extinguisher should be readily accessible in case of emergencies. Additionally, the workspace should be organized to prevent tripping hazards, allowing for easy movement and quick access to tools and equipment.
Equipment Handling and Maintenance
Proper handling and maintenance of your MIG welding equipment are integral to safety. Regularly check cables, leads, and connections for wear, ensuring they are in good condition. Inspect the gas lines to prevent leaks, and ensure the shielding gas cylinder is secure and properly stored. Be aware of the specific settings and capabilities of your MIG welder, as improper settings can lead to excessive heat and potential accidents.
Incorporating these safety protocols not only protects the welder but also contributes to the efficiency and quality of the welds produced. Engaging in routine safety audits, training, and refresher courses on welding protocols will further enhance safety awareness and skills, ensuring a productive and secure welding environment. Prioritizing safety allows welders to focus on the task at hand, ultimately leading to better results and a more satisfying welding experience.
Tips for Achieving Quality Aluminum Welds
Achieving high-quality aluminum welds with a MIG welder requires a blend of skill, preparation, and the right techniques. One of the primary factors influencing weld quality is the choice of filler material. Select a filler that is specifically designed for aluminum, such as 4047 or 5356, as these are formulated to provide strong, durable welds that match the characteristics of the base metal. Make sure the filler wire diameter is suitable for your specific project-typically, using 0.030″ or 0.035″ for aluminum works well, depending on the thickness of the material.
Proper surface preparation cannot be overstated. Begin by thoroughly cleaning the aluminum pieces to remove any contaminants such as oil, grease, and oxides. Use a stainless steel brush or a chemical cleaner specifically for aluminum. This preparation is crucial because contaminants can lead to poor arc stability and weak welds. After cleaning, inspect the joint fit-up; gaps should be minimized to ensure a uniform weld bead. A secure alignment between the pieces being welded will prevent distortion and porosity, thus enhancing the structural integrity of your weld.
When it comes to settings on your MIG welder, ensure that the voltage and wire speed are appropriately adjusted for aluminum. A higher voltage typically allows for better penetration, while an appropriate wire speed ensures a steady feed for even melty characteristics. Start with a short circuit transfer technique, which is suitable for welding thinner materials and leads to cleaner welds with less spattering-critical when working with aluminum’s often thinner profiles.
Finally, practice controlled welding techniques such as maintaining a consistent travel speed and angle. The welder should travel smoothly along the joint, and it’s advisable to experiment with different welding tempos during practice sessions to find what works best for your specific setup. Keep in mind that maintaining a proper distance between the contact tip and the workpiece helps create an optimal arc length, which is key to achieving a quality aluminum weld. By following these tips and being attentive to both equipment settings and technique, you can significantly improve the quality and reliability of your aluminum welds.
Post-Welding Inspection and Finishing Techniques
After the welding process is complete, meticulous are essential to ensure the integrity and appearance of aluminum joints. Though MIG welding is known for its efficiency, the specific characteristics of aluminum can lead to unique challenges such as warping and surface defects that require careful attention.
Start by examining the welds visually for any signs of imperfections. Look for consistent bead width, uniform penetration, and lack of defects such as porosity or cracks. Conduct a methodical check of the weld joint using tools such as a magnifying glass or a visual inspection mirror, if necessary. Ensure that there are no gaps or overlapping welds, as these could compromise the structural integrity of the joint.
For finishing, sanding or grinding is often required to remove any splatter or rough edges caused during welding. Utilize a flap disc on an angle grinder or a fine-grit sanding block to smooth out any irregularities. Always remember to maintain the original profile of the aluminum piece as much as possible to avoid altering its structural properties. If additional aesthetics are desired, consider applying a mill finish or a protective coating after finishing to enhance corrosion resistance and visual appeal.
Testing Weld Strength
In addition to visual inspections, performing strength tests on welded joints can provide deeper insights into the quality of your work. A simple bend test can demonstrate the weld’s ability to withstand stress-by applying pressure on either side of the joint, you can assess any weaknesses. For critical or high-load applications, consider more rigorous methods such as ultrasonic testing or X-ray inspection to ensure the weld meets industry standards.
Proper Cleaning and Maintenance
After finishing, clean the welded area to remove any contaminants that may have accumulated during the fabrication process. A simple solution of warm soapy water followed by rinsing is often sufficient, but for tougher residues, consider using chemical cleaners designed specifically for aluminum. This step is vital in preventing post-weld corrosion, especially in areas exposed to moisture.
Finally, regular maintenance of your MIG welder is critical. Inspect the contact tips and liners for wear and replace them as necessary. Ensure your gas supply is sufficient and that your welding machine is kept clean and free from debris. These practices will promote longer equipment life and enhance the quality of future welds. By incorporating thorough inspection and finishing techniques into your workflow, you not only elevate the quality of your work but also safeguard the longevity of the aluminum structures you create.
Alternative Welding Methods for Aluminum Comparison
When considering how to weld aluminum effectively, it’s worth examining various welding methods to determine which best suits your project’s needs. While MIG welding is often favored for its speed and ease of use, alternative techniques like TIG welding, stick welding, and flux-cored welding offer distinct advantages depending on the specific requirements of your application.
TIG (Tungsten Inert Gas) welding is a highly controllable process that excels in producing clean, high-quality welds on aluminum. The ability to manipulate the heat input allows for better control, making TIG a preferred choice for thinner materials where precision is critical. With TIG welding, the welder manually feeds a filler rod, which can lead to more consistent and aesthetically pleasing welds. However, this method is generally slower than MIG welding and requires more skill and practice to master, making it less ideal for beginners or larger-scale projects.
Stick welding, or SMAW (Shielded Metal Arc Welding), is less commonly used for aluminum but can still be effective, particularly in outdoor environments where winds or contaminants might disrupt gas shielding in MIG or TIG processes. This method utilizes a consumable electrode that melts into the weld puddle, allowing it to join aluminum parts. However, stick welding can produce a rougher surface finish and requires extensive cleaning of the aluminum surfaces to prevent contamination, which might not be suitable for applications requiring high precision.
Another technique, flux-cored welding, involves using a tubular wire filled with flux that eliminates the need for external shielding gas. While primarily used for steel, specialized flux-cored wires are available for aluminum. This method offers high deposition rates and good penetration, making it effective for thicker materials. However, it produces more smoke and spatter than other processes, requiring additional clean-up and finishing work afterward.
Choosing the right welding method involves a careful assessment of factors such as material thickness, joint design, and desired weld quality. Ultimately, while MIG welding remains popular for its efficiency and ease of use, exploring these alternative methods can yield superior results in specific scenarios, particularly when precision or environmental conditions are involved. Familiarizing yourself with each technique can enhance your overall welding skill set, equipping you to tackle a broader range of projects with confidence.
Maintenance and Care for Your MIG Welder
To ensure the longevity and performance of your MIG welder, regular maintenance is crucial. Just as a car requires oil changes and tune-ups, your welding equipment needs consistent care to function optimally and provide high-quality welds. Neglecting maintenance can lead to subpar results and even equipment failure, which can be costly and time-consuming.
Start with the basics: regularly inspect the MIG welder for any signs of wear and tear. Check all cables and connections for fraying or breaks, as damaged lines can hinder performance and create safety hazards. Maintain a clean work environment around your welder to avoid contamination. Metal shavings, dust, and other debris can interfere with the machine’s performance and affect the quality of your welds. Use a vacuum or a damp cloth to keep the area around the welder tidy.
Cleaning the welding gun is another essential task that should not be overlooked. After each use, inspect the nozzle and contact tip for clogging or buildup of spatter. A clean nozzle allows for a more stable arc and better wire feeding. You can use a dedicated nozzle cleaning tool or drill bit to maintain the appropriate clearances. Additionally, regularly replace the contact tips and nozzles as they wear out; doing so will maintain the integrity of your welds.
Lastly, ensure that your gas cylinder and regulator are functioning properly. Regularly check for leaks by applying soapy water to the connections; any bubbling indicates a leak that requires immediate attention. Maintain the right gas mixture, as it is vital for shielding from contaminants during the welding process. Following these maintenance steps will greatly contribute to the efficiency and effectiveness of your MIG welder, allowing you to tackle aluminum welds with confidence and precision.
Finding Additional Resources for Aluminum Welding
To enhance your skills and knowledge in aluminum welding, a plethora of resources is available that cater to both novices and seasoned professionals. Understanding where to look can make all the difference in mastering MIG welding techniques for aluminum. From instructional videos to certified courses, a combination of theoretical knowledge and practical demonstrations is essential for developing expertise.
Start by exploring online platforms like YouTube, where numerous welding experts share video tutorials covering everything from basic techniques to advanced welding projects. Channels dedicated to welding often break down complex concepts into digestible pieces, making it easier to visualize the welding process. Websites such as the American Welding Society (AWS) provide valuable resources, including industry standards, publications, and educational opportunities specifically focused on welding methods, safety practices, and material properties.
Consider enrolling in welding classes or workshops offered by local community colleges or vocational schools. These hands-on experiences can significantly boost your confidence and skill set. Additionally, many manufacturers of welding equipment provide resources, including user manuals, welding guides, and product-specific tutorials, which can be particularly helpful when learning to operate your MIG welder efficiently.
For ongoing education, joining welding forums and online communities can be invaluable. Engaging with other welders allows for the exchange of tips, troubleshooting advice, and updates on new technology and techniques within the industry. Staying connected to the welding community will help you refine your skills and keep you informed about best practices, safety measures, and innovative welding techniques.
Faq
Q: What type of gas should I use for MIG welding aluminum?
A: For MIG welding aluminum, use 100% argon gas, as it provides the best shielding for aluminum and prevents oxidation during the welding process. It is essential for achieving strong and clean welds. Refer to the section on “Essential Equipment for MIG Welding Aluminum” for more details.
Q: How do I clean aluminum before MIG welding?
A: Clean aluminum by removing any oils, dirt, and oxidation. Use a solvent like acetone, followed by a stainless steel brush or a dedicated aluminum cleaner to prepare the surface. This will ensure better adhesion and quality in your welds, as discussed in the article section on “Preparing Aluminum Materials for a Successful Weld.”
Q: Can I weld aluminum to steel using a MIG welder?
A: Welding aluminum to steel directly using a traditional MIG process is challenging due to differing melting points and properties. Instead, consider using a specialized filler metal or explore alternative methods like using a bimetallic adapter to achieve a strong bond. Check “Alternative Welding Methods for Aluminum Comparison” for further insights.
Q: What should my MIG welder settings be for aluminum?
A: MIG welder settings for aluminum typically require a higher voltage and wire feed speed compared to steel. Start with a voltage between 20-25 volts and adjust based on the thickness of the aluminum. Detailed settings can be further explored in the “Setting Up Your MIG Welder for Aluminum” section.
Q: What are the common mistakes to avoid when MIG welding aluminum?
A: Common mistakes include not properly cleaning aluminum surfaces, using incorrect welder settings, and moving too quickly. These can lead to weak, porous welds. For a deeper understanding, refer to the “Common Challenges When MIG Welding Aluminum” section.
Q: How do I prevent warping while MIG welding aluminum?
A: To prevent warping, minimize heat input by using short welds and letting the material cool between passes. Use proper clamping techniques to secure the workpieces. More effective tips are available in the “Tips for Achieving Quality Aluminum Welds” section.
Q: Is MIG welding aluminum more challenging than steel?
A: Yes, MIG welding aluminum is generally more challenging than steel due to aluminum’s thermal properties and tendency to oxidize. Understanding these nuances is critical, as outlined in “Understanding the Basics of Aluminum Welding with MIG.”
Q: What is the best MIG wire for welding aluminum?
A: The best MIG wire for welding aluminum is typically ER4043 or ER5356, depending on the application. ER4043 is versatile for general use, while ER5356 is better for higher strength needs. Consult the “Essential Equipment for MIG Welding Aluminum” for more specifications.
For more detailed guidance on MIG welding aluminum, explore our other sections to enhance your skills and knowledge.
Final Thoughts
Now that you know how to weld aluminum with a MIG welder, it’s time to put your skills into action. Remember, practice makes perfect-so don’t hesitate to revisit key techniques. If you’re eager to dive deeper, check out our detailed guides on TIG welding for precision projects or explore safety protocols to enhance your welding experience. Investing in the right equipment and understanding material properties can elevate your work significantly.
Feeling inspired? Share your latest projects in the comments below or connect with fellow enthusiasts on our community forum. And to make sure you stay ahead in the welding game, subscribe to our newsletter for tips, tricks, and exclusive content. By honing your craft and exploring new techniques, you’ll not only improve your skills but also boost your confidence on every weld. Happy welding!