TIG welding stainless steel is an essential skill for any welder, known for its precision and ability to produce high-quality, clean welds. Did you know that this technique not only joins metals but also enhances their resistance to corrosion? Whether you’re a novice aiming to master the basics or an experienced welder looking to refine your technique, understanding the details of TIG welding can significantly impact the durability and aesthetics of your projects. This guide will navigate you through important aspects like surface preparation, electrode selection, and settings, ensuring you achieve perfect results every time. Let’s dive deeper into the art of TIG welding stainless steel and unlock your potential in this vital trade.
Essential TIG Welding Equipment for Stainless Steel
To achieve a successful TIG welding project on stainless steel, the right equipment is paramount. Unlike other welding methods, TIG welding requires specific tools that can handle the unique properties of stainless steel, which is known for its corrosion resistance and durability. Proper equipment not only ensures high-quality welds but also enhances safety and efficiency in the welding process.
Key components of essential TIG welding equipment include:
- TIG Welder: Select a high-frequency inverter welder that is capable of delivering precise heat control. Look for one with pulse capabilities and AC/DC options if working with various materials.
- Tungsten Electrodes: Use a non-consumable tungsten electrode with a specific diameter based on the thickness of the stainless steel. For most applications, a 2% lanthanated or a pure tungsten electrode works best.
- Filler Rods: Choose the correct filler rod, such as ER308L or ER316L, depending on the stainless steel grade being welded. The filler rod should have similar composition and properties to the base metal to ensure a good bond.
- Shielding Gas: Use pure argon or an argon-helium mixture as your shielding gas to protect the weld puddle from atmospheric contamination, which can lead to defects.
- Protective Gear: Always wear appropriate safety gear, including a welding helmet with a suitable shade, gloves, and protective clothing to shield against UV radiation and heat.
- Work Surface and Clamping Equipment: Ensure you have a stable work surface and quality clamps to secure your pieces, preventing movement during the welding process.
Having the right tools allows for a smoother, more controlled welding experience, particularly crucial when working with stainless steel, whose thermal properties can pose challenges. Investing in quality equipment lays the foundation for producing strong, clean welds that meet the structural and aesthetic requirements of your projects.
Understanding the Properties of Stainless Steel
Stainless steel is renowned for its strength, durability, and resistance to corrosion, making it a favored choice in various applications, from construction to culinary tools. is crucial for achieving successful TIG welds, especially given its unique behavior under heat and its interaction with different welding processes. Stainless steel consists primarily of iron, with a minimum of 10.5% chromium content, which grants it corrosion-resistant properties. This material also includes varying amounts of nickel, manganese, and molybdenum, influencing its mechanical properties and resistance to oxidation.
One key characteristic of stainless steel is its low thermal conductivity. This property can pose challenges during TIG welding, as heat tends to concentrate in a smaller area, increasing the risk of warping and excessive heat input. Consequently, controlling the heat during the welding process is essential. Utilizing a high-frequency inverter welder with precise control settings can help mitigate this issue, allowing for a focused arc that minimizes the heat-affected zone. Furthermore, the high melting point of stainless steel-typically around 1400-1450°C (2550-2640°F)-necessitates the use of suitable filler materials to ensure compatibility and strength in the weld joint.
Another aspect to consider is the susceptibility of stainless steel to oxidation when exposed to high temperatures. This can lead to discoloration or “sugaring” at the weld area if not adequately protected. Using pure argon or an argon-helium mixture as a shielding gas helps safeguard the weld pool from atmospheric elements, ensuring a clean and strong weld. Remembering the benefits of post-weld treatment, such as passivation, can further enhance corrosion resistance and structural integrity, extending the life of the welded component.
In working with different grades of stainless steel, it’s vital to recognize the variations in their mechanical properties. Each type, such as austenitic, ferritic, or martensitic stainless steel, may require specific filler rods and techniques to ensure optimal results. For instance, austenitic stainless steels, known for their excellent formability and weldability, often rely on filler rods like ER308L, while ferritic grades might use ER409 to maintain the weld’s structural integrity. Understanding these nuances allows for better project planning and execution, ultimately resulting in high-quality welds and durable structures.
Preparing Your Workspace for TIG Welding
Creating a safe and efficient workspace can substantially enhance the quality of TIG welding results. An organized environment reduces distractions and fosters a focused attitude, which is crucial when working with stainless steel, given its specific properties and the precision required in the welding process. The workspace should be clean, well-lit, and equipped with all necessary tools and materials, allowing for seamless execution of tasks.
To establish a solid foundation for your welding endeavors, begin by ensuring proper ventilation. TIG welding produces fumes that can be harmful when inhaled, and adequate airflow not only safeguards your health but also helps to prevent the buildup of flammable gases. Setting up in a designated work area, preferably outdoors or in a well-ventilated shop, is highly recommended. If an outdoor setup isn’t feasible, consider using exhaust fans or fume extractors to maintain a safe environment.
- Surface Preparation: Utilize a stable, non-flammable surface for your welding projects. Workbenches should ideally be free from clutter, tools, and materials that pose a fire hazard. A clean work surface helps prevent contamination of your components, crucial for producing high-quality stainless steel welds.
- Tool Accessibility: Gather all necessary tools before commencing work. This includes your TIG welding machine, appropriate tungsten electrodes, filler rods, protective gear, and necessary measurement instruments. Having everything at hand streamlines the process and minimizes interruptions.
- Safety Gear: Equip yourself with the right personal protective equipment (PPE). This includes gloves, a welding helmet with appropriate shade, long-sleeved clothing, and steel-toed boots to protect against sparks and molten metal. Regularly inspect your gear for any wear or damage, ensuring maximal protection.
- Organize Electrical Supplies: Keep your power supply organized and ensure that all electrical connections are compliant with safety standards. Use proper extensions rated for the amperage of your TIG welder to avoid any electrical hazards.
Finally, consider the layout of your workspace. Position your welding machine, materials, and tool storage in a manner that allows for easy movement while welding. Having all elements well-defined can significantly impact your workflow, allowing you to focus more on technique and quality, rather than fumbling for tools or materials. By investing time in preparing your workspace, you’ll foster an atmosphere conducive to achieving precise and aesthetically pleasing TIG welds on stainless steel.
Mastering the Basics of TIG Welding Technique
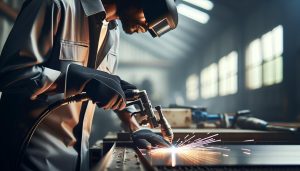
Creating a flawless TIG weld, especially when working with stainless steel, requires understanding the synergy between technique, equipment, and material properties. Among the many factors that contribute to successful welding, mastering the basic techniques of TIG welding is paramount. One of the key advantages of TIG welding is its precision, allowing for clean, strong welds that showcase the aesthetic qualities of stainless steel.
To begin, ensure that you are using the correct tungsten electrode size and type for your specific application. The tungsten should be sharpened to a fine point to create a focused arc. This parameter is particularly important when welding thinner sheets, as a narrow arc leads to better control and minimizes the risk of burn-through. Set your welder to the appropriate amperage according to the thickness of the stainless steel, typically using 1 amp per 0.001 inch of thickness known as the “1 amp per .001” rule.
As you initiate the weld, maintain a steady hand and a consistent travel speed. It’s critical to keep the arc length appropriate; a too-short arc can lead to excessive heat, while an overly long arc can result in poor fusion and contamination. Aim for a small, cone-shaped welding puddle at the leading edge of the weld, which should have a smooth, fluid motion. The right angle of the torch should be about 15 to 20 degrees from vertical, forming a slight push into the weld puddle. This position lets the inert gas effectively shield both the tungsten and the molten weld pool from contamination.
Another essential element in mastering TIG welding technique involves the use of filler rods. When applicable, introduce the filler rod seamlessly into the weld puddle. Timing is crucial; feed the filler rod into the puddle just as it begins to melt, allowing for a consistent and strong joint. This action demands practice to synchronize your movements without slowing down the travel speed, which can lead to uneven weld beads or inclusions.
To ensure optimal results, constantly evaluate the quality of your welds as you work. Examine for consistency in bead size and color, and be vigilant for any signs of defects such as porosity or undercutting. Addressing issues in real-time results in a more satisfactory final product. By honing these foundational techniques, including torch control, filler rod application, and arc management, you will gain the confidence to tackle more complex stainless steel projects with precision and professionalism.
Choosing the Right Filler Rod for Stainless Steel
Choosing the correct filler rod is paramount for producing high-quality TIG welds on stainless steel. With various alloys and grades of stainless steel available, the right filler rod not only enhances the strength and appearance of the weld but also ensures optimal corrosion resistance-an essential factor for applications in environments prone to oxidation. The most commonly used filler rods for stainless steel are ER308L, ER316L, and ER347, each designed to complement specific base materials.
One of the critical aspects to consider when selecting a filler rod is the composition of both the base metal and the filler wire. For instance, using ER308L is appropriate for welding 304 stainless steel, while ER316L is better suited for 316 stainless steel owing to its enhanced resistance to pitting and crevice corrosion. It is crucial to examine the intended application of the weld, as the mechanical and chemical properties of the filler can impact not only the integrity of the weld but also its long-term performance under stress.
When working with dissimilar metals or specific environments, filler rods from the 400 series might also come into play, offering properties suited for applications requiring higher strength at elevated temperatures. Additionally, ensure that the filler rod is free from contaminants; any impurities can lead to defects such as porosity, inclusions, and a weakened joint.
It’s equally important to consider the diameter of the filler rod. Typically, a 1/16 inch (1.6 mm) rod is advantageous when working with thinner materials due to its controlled melting rate, while a 3/32 inch (2.4 mm) rod can be used for thicker sections. Ultimately, the choice of filler rod should align with both the specifications of the stainless steel being welded and the welding conditions. By rigorously assessing these factors, you will significantly improve your chances of achieving strong, aesthetically pleasing welds that are built to last.
Adjusting Your TIG Welder Settings for Perfection
Adjusting the settings of your TIG welder is crucial for achieving flawless results, especially when working with stainless steel. The integrity and appearance of your weld can dramatically differ based on how well you calibrate your machine to suit the material and conditions at hand. To start, it’s essential to focus on the amperage setting, which significantly influences the heat input. For stainless steel, a general guideline is to set your amperage at approximately 1 amp per 0.001 inches of material thickness; for example, a 0.120-inch (approximately 1/8 inch) thick piece would require around 120 amps. However, this baseline may need adjustments based on your specific parameters, including travel speed and joint configuration.
Another critical aspect of welder settings is the balance of AC frequency and cleaning action if using an AC TIG welder. A higher frequency will allow for more concentrated arc control, which is often beneficial for thin stainless steel materials as it minimizes heat spread and helps reduce distortion. Typically, settings around 100-200 Hz work well for stainless steel, enhancing the welder’s ability to create a narrow arc profile. Adjusting the cleaning action effectively allows you to prevent contamination on the weld surface, crucial for stainless steel, as it can tarnish and lose its corrosion resistance if not adequately prepared.
In addition to these foundational settings, the choice of shielding gas plays a pivotal role. While pure argon is the standard choice for TIG welding of stainless steel, incorporating a small percentage of hydrogen (around 2-5%) in the mix can improve arc stability and provide assistance in overcoming issues like contamination. When configuring your TIG welder, ensure that your gas flow rate is set correctly; typically, 15-25 cubic feet per hour (CFH) is a good range, with adjustments based on specific joint designs and environmental factors such as wind or drafts.
Lastly, the tungsten electrode’s preparation is equally essential. For stainless steel, using a 2% thoriated or ceriated tungsten electrode sharpened to a point is ideal, as it offers precise control over the arc. Always remember to maintain a clean environment around your welding area, as contaminants can lead to defects such as porosity and inclusions in your weld. With these settings carefully adjusted, you’re setting the stage for not just functional, but also aesthetically pleasing and durable welds that will stand the test of time.
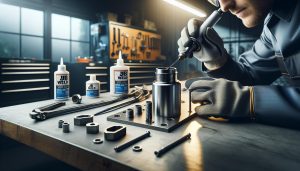
Achieving Clean Weld Joints: Surface Preparation Tips
The success of any TIG welding project, especially when working with stainless steel, hinges significantly on the cleanliness of the metal surface being welded. Even the smallest contaminants can lead to defects such as porosity, lack of fusion, and overall structural weakness. To ensure that your welds are both visually appealing and structurally sound, following proper surface preparation techniques is crucial.
Start by removing any dirt, grease, paint, or oxidation present on the surface of the stainless steel. Use a combination of mechanical and chemical methods for thorough cleaning. For mechanical cleaning, stainless steel wire brushes or abrasive pads can be effective, but be sure to use tools made of stainless steel to avoid cross-contamination. Chemical cleaners designed for stainless steel, such as solvents or degreasers, should also be employed. Always follow the manufacturer’s instructions for these products to ensure safety and efficacy.
After cleaning, it’s essential to perform a final wipe-down with a clean, lint-free cloth. This step removes any residual cleaning agents and particles that might remain on the surface. In certain cases, such as when working with high-purity stainless steel, using isopropyl alcohol for this wipe-down can help eliminate any potential contaminants that could jeopardize the integrity of the weld.
In cases of heavy oxidation or discoloration, chemical passivation might be necessary. This process helps restore the protective oxide layer on stainless steel, improving corrosion resistance and ensuring a cleaner weld. Moreover, prior to welding, visually inspect the surface again to confirm that it’s free of any contaminants. This diligence is part of maintaining a professional standard in your welding practice and will ultimately save time and material by reducing the likelihood of errors during the welding process.
By carefully preparing the stainless steel surface, welders not only enhance the quality of their welds but also contribute to the durability and aesthetics of the final product. Clean, well-prepared surfaces lead to strong, reliable joints that can withstand the test of time, ensuring that your efforts in the welding process yield excellent results.
Avoiding Common TIG Welding Mistakes
TIG welding stainless steel can be a challenging yet rewarding process, with the potential for stunning results when executed properly. However, even experienced welders can fall prey to some common pitfalls that may compromise the integrity and appearance of their welds. Recognizing these mistakes and understanding how to avoid them can significantly enhance the quality and reliability of your projects.
One of the most prevalent mistakes is improper control of the torch angle and distance. Maintaining a consistent angle-ideally between 15 to 25 degrees from the vertical-is crucial for achieving optimal penetration and avoiding undercut. Additionally, keeping the torch at an appropriate distance from the workpiece (typically around 1/8 inch to 1/4 inch) is essential for consistent heating. A common error is holding the torch too far away, which can lead to insufficient fusion and weak joints.
Another frequent issue stems from incorrect amperage settings. Beginners often either undercut or overheat their welds due to miscalculating the required heat. Using too low of an amperage can result in poor penetration and susceptibility to porosity, while excessive amperage may cause burn-through or warping of the material. It is important to adjust the welder settings according to the thickness of the stainless steel being welded, generally aiming for an amperage setting of about 1 amp per thousands of thickness in inches.
Lastly, neglecting the importance of filler rod selection and handling can lead to significant flaws. Selecting the wrong type of filler rod for the specific stainless steel grade can introduce weaknesses in the weld. Moreover, contamination from oils, rust, or corrosion on the filler rod itself can result in defects, so it’s essential to handle filler materials with clean hands and store them properly.
By being aware of these common errors and proactively setting up for success, welders can minimize the likelihood of issues and achieve high-quality TIG welds on stainless steel. This not only enhances the aesthetic appeal of the finished product but also ensures its structural integrity under stress over time.
Advanced Techniques for Complex Stainless Steel Projects
Mastering requires a nuanced understanding of both the material and the TIG welding process. When tackling intricate designs, such as custom fabrications or components with tight tolerances, these skills become paramount to achieving both aesthetic excellence and structural integrity.
One of the primary methods used in advanced TIG welding is the pulsed welding technique. This allows for better heat control, significantly reducing the risk of warping in thin stainless steel sections. Pulsed TIG welding involves alternating between low and high amperage settings, which provides a controlled environment where the molten pool cools slightly before being reheated. This technique not only aids in penetration but also reduces the likelihood of distortion and the development of defects such as crater cracking. Beginners may find this technique challenging, but practicing with different pulse frequencies and adjusting the balance can yield impressive results.
To enhance the quality of welds in complex projects, it is also advisable to utilize back-purging when welding closed sections or root passes. The shielding gas protects the backside of the weld from oxidation and contamination, which is particularly critical for stainless steel. Setting up a proper back purge requires an understanding of the joint configuration and adequate gas flow, ensuring that argon or another inert gas fills the space effectively for a clean weld throughout. The visual difference in the final product is often dramatic, making back-purging a must for any serious fabricator.
Maintaining a consistent travel speed is crucial as well. For complex joints, varying the travel speed can lead to uneven penetration and inconsistent bead shape. Using a steady hand and visual cues from the molten pool can help maintain the ideal speed, balancing the need for penetration with the prevention of excessive heat input. Practicing on scrap pieces with similar geometries to the final work can help in developing a feel for the right speed before moving on to less forgiving applications.
Emphasizing joint design is another key to success in advanced applications. Strong and clean joints, such as those using V-grooves or J-joints, can significantly improve the overall weld quality. A well-planned joint not only facilitates better penetration and fusion but can also reduce the likelihood of defects, making it easier for welders to navigate complex weld paths.
Ultimately, successful advanced welding on stainless steel hinges on a combination of skill and proper technique. By mastering pulsed welding, utilizing back-purging, maintaining consistent travel speed, and focusing on effective joint designs, welders can produce intricate and durable components that both meet aesthetic requirements and withstand rigorous service conditions.
Post-Weld Cleaning and Finishing Techniques
Successfully welding stainless steel is only part of the task; ensuring a pristine finish is equally vital for both appearance and performance. are essential to remove impurities, prevent corrosion, and achieve a professional look. Accounting for factors such as the welding environment, the type of stainless steel used, and the intended application can significantly impact the effectiveness of these processes.
One of the most effective ways to clean welded joints is by using a combination of mechanical and chemical processes. Begin with mechanical cleaning methods such as wire brushing or grinding to eliminate slag, spatter, and surface oxides. A stainless steel wire brush is particularly useful, as it minimizes contamination by using nonferrous materials that won’t introduce iron impurities. Following this, chemical cleaning agents such as pickling pastes or solutions can be applied. These solutions work by dissolving oxide layers and allowing the base material to shine. When using any chemicals, it is critical to follow manufacturer instructions and adhere to safety guidelines, including proper ventilation and the use of suitable personal protective equipment (PPE).
Passivation for Long-term Protection
After the surface is cleaned, passivation plays a crucial role in enhancing the corrosion resistance of stainless steel. This process involves treating the surface with an acid solution, typically citric or nitric acid, which helps to remove free iron from the surface and improve the thickness of the chromium oxide layer inherent to stainless steel. This microscopic layer is essential for corrosion resistance and helps prevent rusting and staining. Allow the passivation solution to sit for a specified time, typically around 30 minutes, before rinsing it off with water, ensuring a thorough clean.
Finishing Touches
To achieve a polished and aesthetically pleasing look, consider further mechanical finishing techniques such as polishing or buffing. Utilizing polishing compounds designed for stainless steel can help smooth out the surface and provide a high-gloss finish. Tools such as buffing wheels or abrasive pads can be employed to achieve the desired lustrous effect. For specialized applications where aesthetic quality is paramount, consider using sandblasting or bead blasting to give a uniform matte finish.
In conclusion, employing these will not only enhance the appearance of your stainless steel welds but also prolong their structural integrity. By combining mechanical and chemical methods, along with regular maintenance practices, you can ensure that your welds remain robust and visually pleasing, meeting both aesthetic and functional standards in various applications.
Safety Protocols When TIG Welding Stainless Steel
Welding stainless steel using TIG (Tungsten Inert Gas) technique presents unique safety challenges that must be carefully managed to protect the welder and the surrounding environment. The nature of this welding process, combined with the materials involved, necessitates a proactive approach to safety protocols. Proper adherence to these protocols not only minimizes risks but also enhances the quality of the weld, ensuring a safe and effective working environment.
A fundamental safety measure is wearing the appropriate personal protective equipment (PPE). Welders should don a proper welding helmet equipped with a suitable shade lens to protect their eyes from the intense light and UV rays emitted during welding. Additionally, flame-resistant clothing, gloves, and long sleeves should be worn to shield skin from burns and sparks. In settings where there might be the release of harmful fumes from tungsten or the stainless steel itself, well-fitted respiratory protection is crucial. Good ventilation is also essential; setting up a fume extractor or working in an outdoor environment can significantly reduce exposure to harmful gases.
Moreover, before starting the welding process, it’s imperative to inspect the work area and equipment. Ensure that the workspace is free from flammable materials, and verify that the TIG welding equipment is functioning correctly, with cables and connections in good condition. Public and industrial welding setups may benefit from implementing a “safety zone” to prevent unintended access during the welding operation. Training personnel on potential hazards associated with TIG welding stainless steel-for instance, the risk of electric shock or inhalation of toxic fumes-is also vital.
Lastly, understanding the cleaning agents and chemicals used in post-weld treatments requires attention to safety data sheets (SDS) and proper handling protocols. Many rust removal and cleaning solutions used in the passivation process can be corrosive, making appropriate storage and disposal practices critical to workplace safety. Consistent education and awareness about safety measures help ensure that both novice and experienced welders can perform their tasks without exposing themselves or others to avoidable risks and hazards. By emphasizing these safety protocols, welders can confidently navigate the intricacies of TIG welding stainless steel, optimizing their performance while safeguarding their health.
Troubleshooting Common TIG Welding Problems
Troubleshooting issues during TIG welding can often feel daunting, especially when working with stainless steel. However, many common problems can be identified and resolved with a clear understanding of the equipment, techniques, and materials involved. This knowledge is key to achieving clean, strong welds consistently, ensuring both functionality and aesthetic appeal.
One frequent issue welders encounter is inconsistent arc stability. This problem can lead to irregular beads, undercutting, or even porosity. To address this, ensure that your tungsten electrode is properly ground to a fine point and clean. The tungsten should not be contaminated with oils or other substances; even a small amount can significantly impact performance. Additionally, check the gas flow rate; too little shielding gas can cause the arc to become unstable. A flow rate between 15-20 CFH (cubic feet per hour) is generally recommended for stainless steel.
Another common challenge is excessive spatter or oxidation on the weld bead. This often results from improper gas coverage during welding. Ensure that your shielding gas-commonly 100% argon for stainless steel-is flowing steadily and that your torch is angled appropriately to shield the weld pool. If spatter persists, consider adjusting your welder settings; lower amperage and slower travel speed can help reduce excessive heat input, leading to a cleaner weld.
Common Welding Problems and Solutions
| Problem | Symptoms | Solutions |
|---|---|---|
| Inconsistent Arc Stability | Irregular beads, undercutting, porosity | Check tungsten grind, inspect gas flow, adjust amperage |
| Excessive Spatter/Oxidation | Rough surface finish, unwanted cleanup needed | Adjust gas coverage, check torch angle, lower amperage |
| Porosity | Vacuum pockets in the weld bead | Ensure clean metal surfaces, inspect shielding gas for contamination |
| Burn-Through | Base metal shows holes or excessive damage | Lower amperage, increase travel speed |
Finally, porosity can present another significant hurdle. This issue arises from moisture or contamination on the metal surface. Prior to welding, it’s critical to clean the base material thoroughly using solvents or a wire brush specifically intended for stainless steel. Avoid welding in damp environments, and always inspect your gas for impurities that could lead to contamination.
By understanding and addressing these common problems, welders can not only enhance their skills but also significantly improve the quality and consistency of their TIG welds on stainless steel. Experience, combined with a keen attention to detail and proactive troubleshooting, will lead to perfect techniques on your welding journey.
Q&A
Q: What is the best tungsten electrode for TIG welding stainless steel?
A: The best tungsten electrode for TIG welding stainless steel is typically a 2% thoriated or lanthanated tungsten. Thoriated tungsten offers excellent arc stability and can handle high amperage, while lanthanated tungsten is a newer option that provides similar benefits, especially with AC welding.
Q: How do I avoid warping when TIG welding stainless steel?
A: To avoid warping when TIG welding stainless steel, control your heat input by using a lower amperage and moving steadily. Pre-heating thick sections and welding in short bursts can also help minimize thermal stress.
Q: What is the role of filler rod in TIG welding stainless steel?
A: The filler rod serves to add material to the weld joint and enhance its strength. For stainless steel, ensure you choose a filler rod that matches the base metal, such as ER308L for 304 stainless steel, to maintain corrosion resistance and weld integrity.
Q: Why is cleanliness important in TIG welding stainless steel?
A: Cleanliness is crucial in TIG welding stainless steel because contaminants like oils, dirt, or rust can lead to porosity in the weld. Thoroughly degrease and clean the surface before welding to ensure strong, defect-free welds.
Q: How do I set the right gas flow rate for TIG welding stainless steel?
A: The ideal gas flow rate for TIG welding stainless steel usually ranges from 15 to 20 cubic feet per hour (CFH). Adjust based on the area and specific conditions, ensuring adequate shielding without excessive turbulence that can introduce contaminants.
Q: What common mistakes should I avoid when TIG welding stainless steel?
A: Common mistakes in TIG welding stainless steel include using too much heat, inadequate cleaning of the surfaces, and improper filler rod selection. Ensure you maintain correct arc length and move consistently to avoid burn-through and weak welds.
Q: How can I improve arc stability when TIG welding stainless steel?
A: To improve arc stability when TIG welding stainless steel, maintain a consistent arc length, use the appropriate tungsten and gas, and ensure your welder settings are optimized. A clean and dry environment also aids arc stability.
Q: What safety gear is essential for TIG welding stainless steel?
A: Essential safety gear for TIG welding stainless steel includes a welding helmet with the proper shade, heat-resistant gloves, flame-resistant clothing, and protective footwear. Additionally, ensure adequate ventilation to avoid inhaling any fumes.
To Wrap It Up
Mastering TIG welding for stainless steel not only enhances your skill set but also opens doors to numerous professional opportunities. By implementing the techniques shared in “How to TIG Weld Stainless Steel: Perfect Technique Every Time,” you’ll be equipped to achieve cleaner, stronger welds that stand the test of time. Don’t let uncertainty hold you back-grab your welding torch and start practicing today!
For more advanced techniques, check out our detailed guides on MIG Welding Techniques and Safety Protocols for Welders to broaden your expertise. Join our newsletter for exclusive tips and product reviews to keep your skills sharp and your toolkit up to date. Have questions or tips of your own? We’d love to hear from you in the comments below! Remember, every expert was once a beginner-stay curious and keep exploring!